|
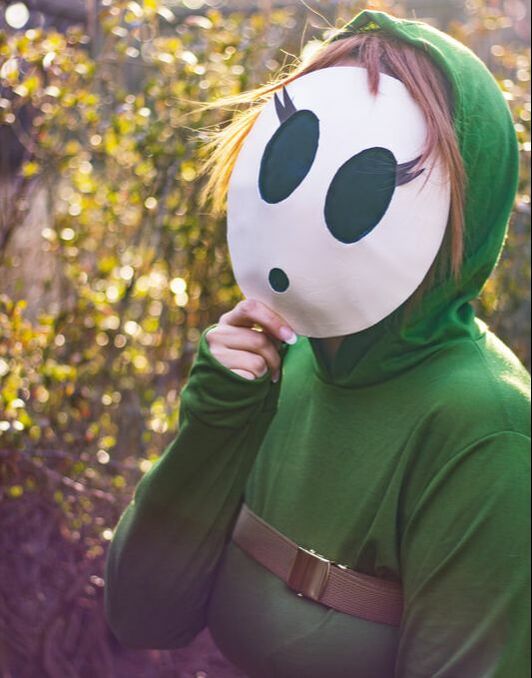
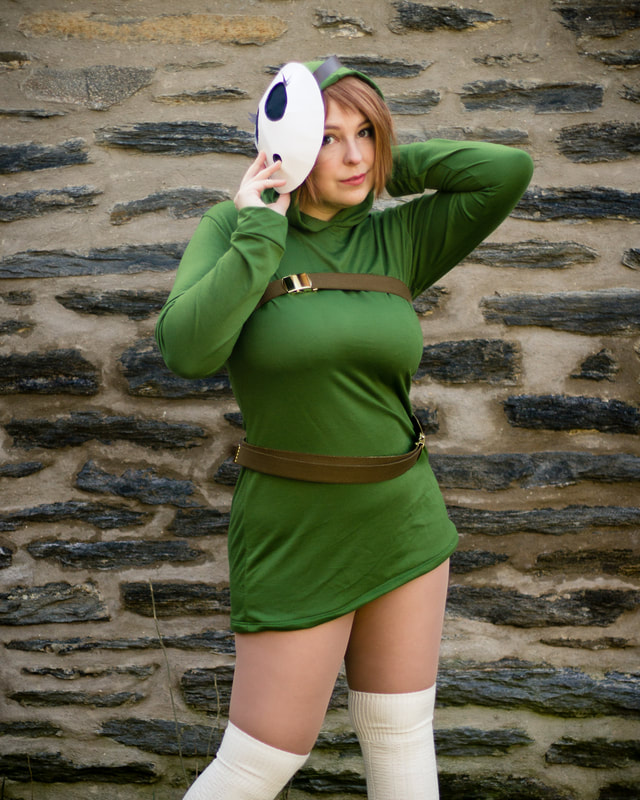
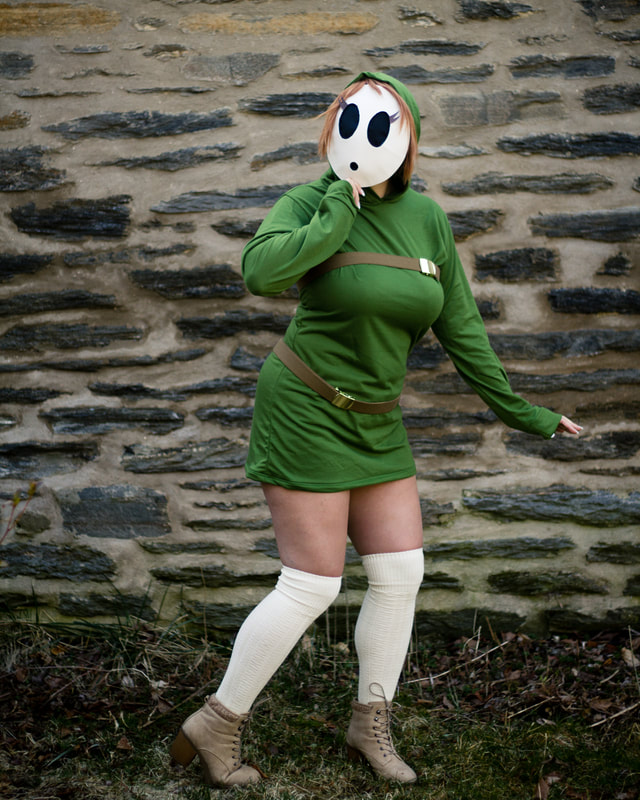
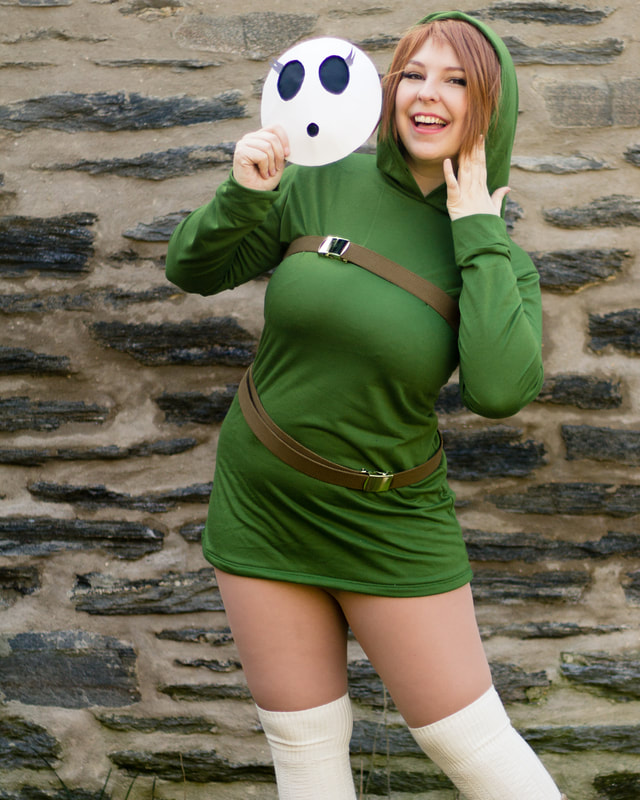
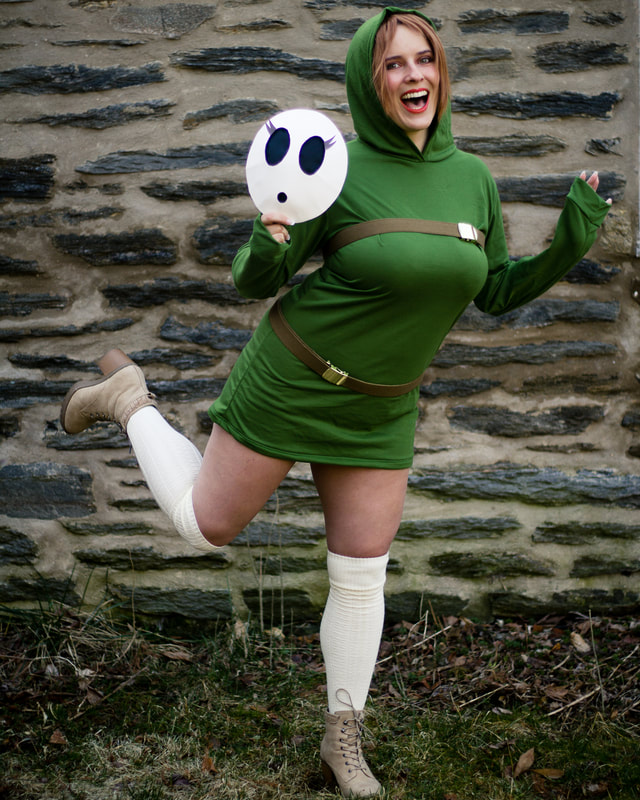
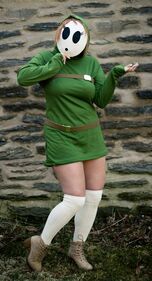
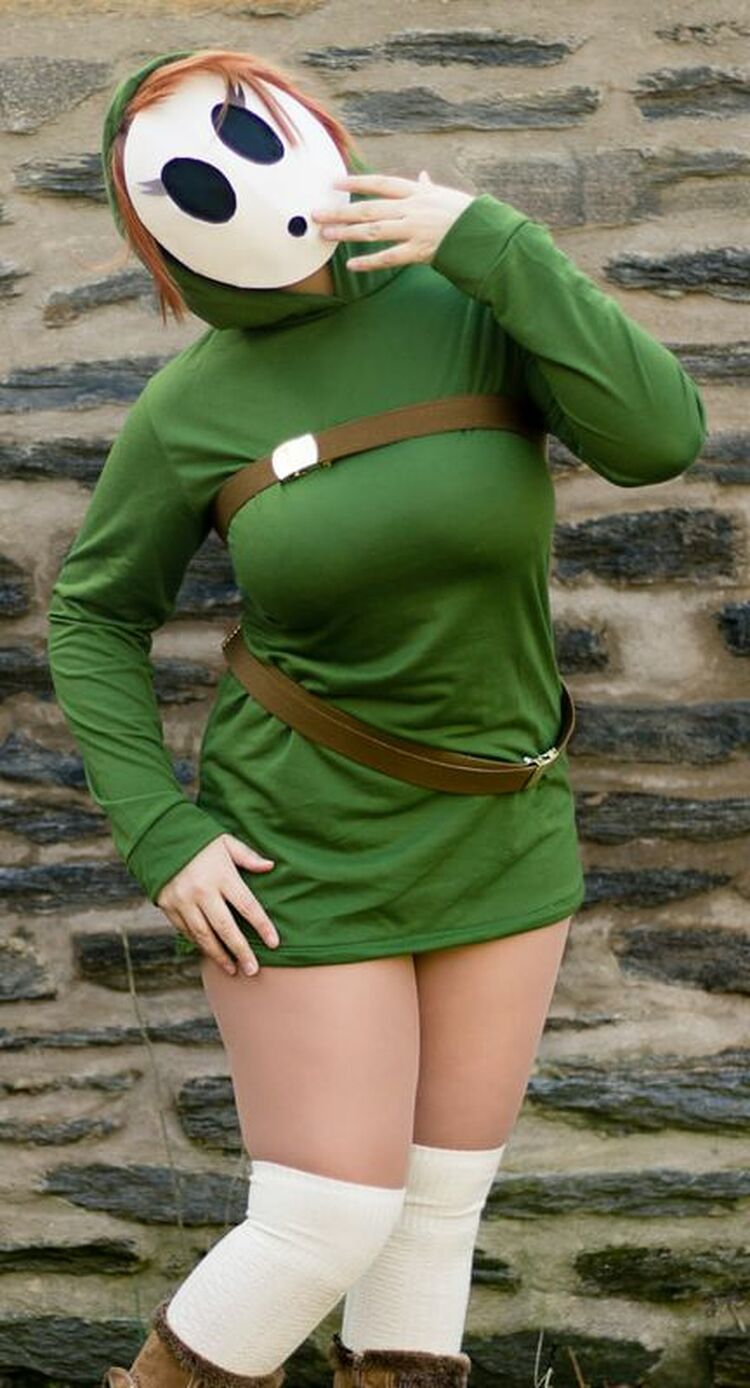
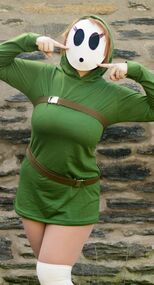
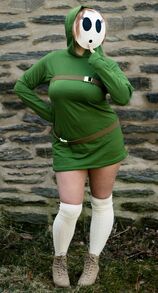
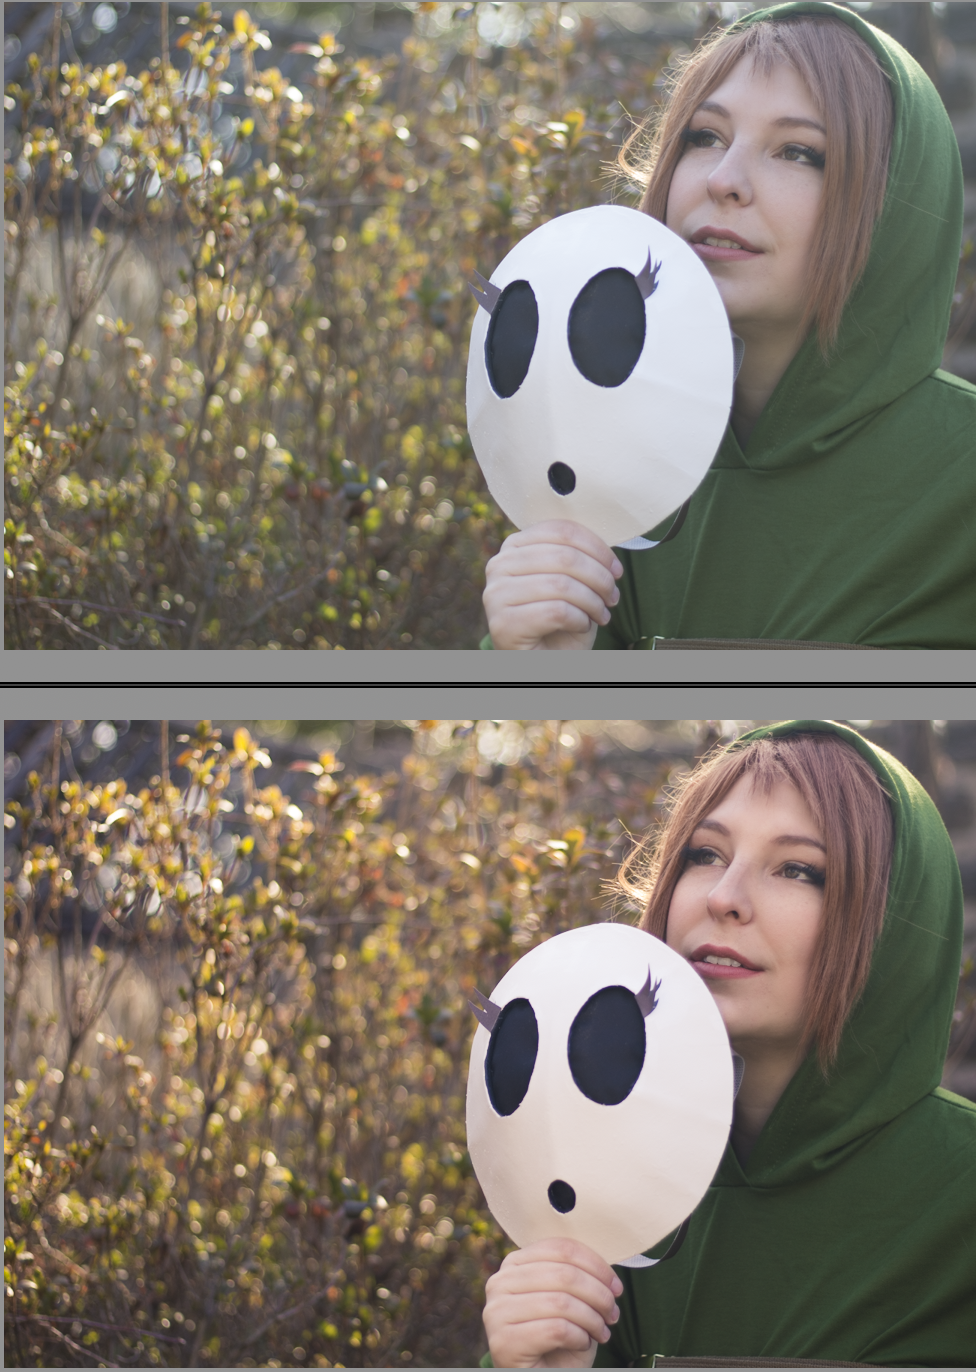
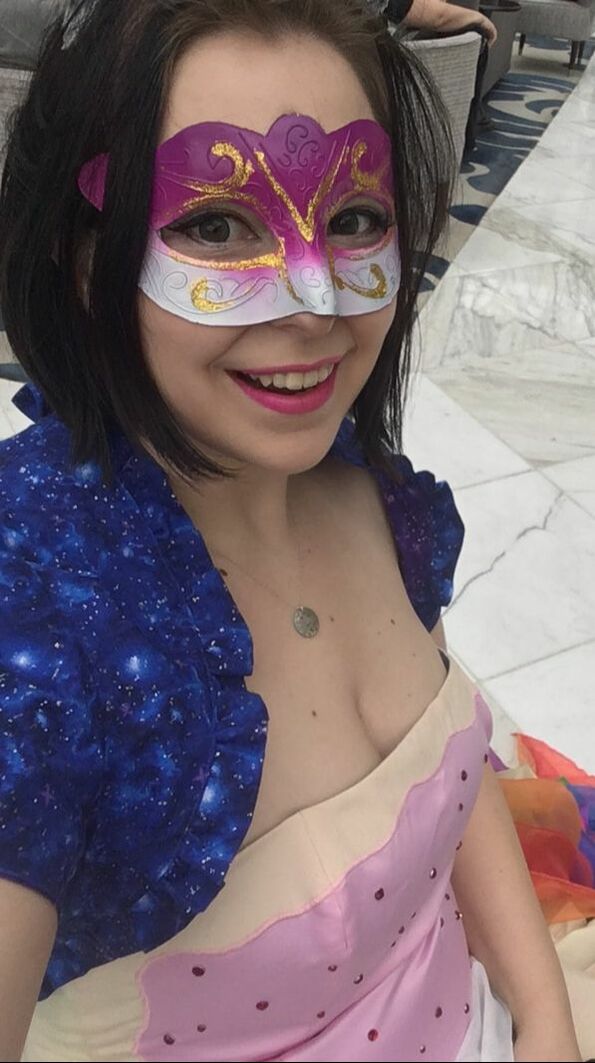
Happy April Fools Day! 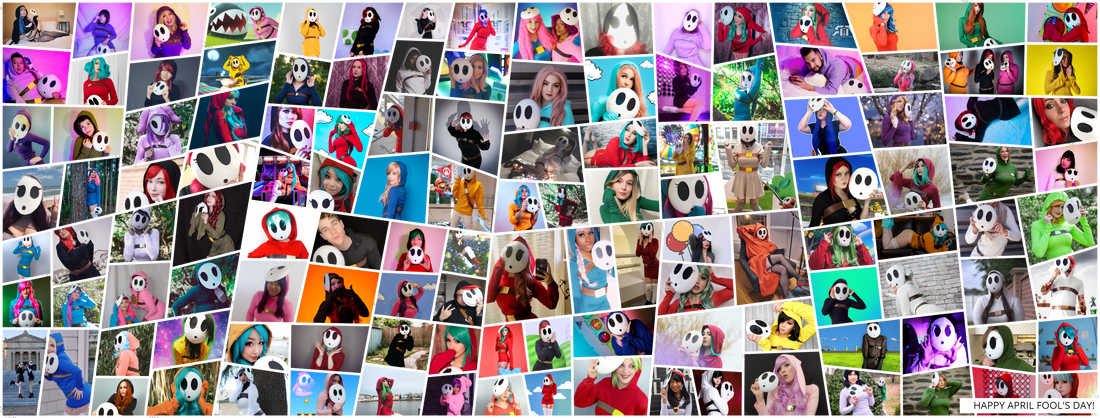 Photo collage by @gaiuscosplay This year, cosplayers everywhere teamed to make sure King Koopa won the big race -- by dressing up as Shy Gals and distracting the rest of the competition. You may have seen your various social media feeds inundated with the #shygalgang, and I was so fortunate to be able to join in!
My lovely roommate Kelley and I teamed up to make one costume that we took turns wearing for the photoshoot! Kelley bought the dress and made the mask, and I supplied the belts and photo edits. I wasn't expecting the photos to turn out as well as they did, especially for such a quick and easy costume!
Which ones are me, and which are Kelley?? I'll never tell, muahahaha I used a very natural editing style for this set; I relied almost entirely on Lightroom, only pulling one picture into Photoshop to smooth out some bumps on the mask.
Even though we shot these at 8AM in the morning, it looks like these shots were taken at golden hour and I LOVE THEM! All in all, it was a hugely successful prank and I hope to be involved next year, too! Don't forget to check out all the coverage of the Shy Gals prank! Here are some places to look:
Plus an extra big shoutout to @gaius.cosplay for organizing the entire prank! Missed out on the fun? If you would like to be included on next year's prank, send me an e-mail or a message on Instagram, Twitter, or Facebook, before April 8 and I'll send you a link to the group!
0 Comments
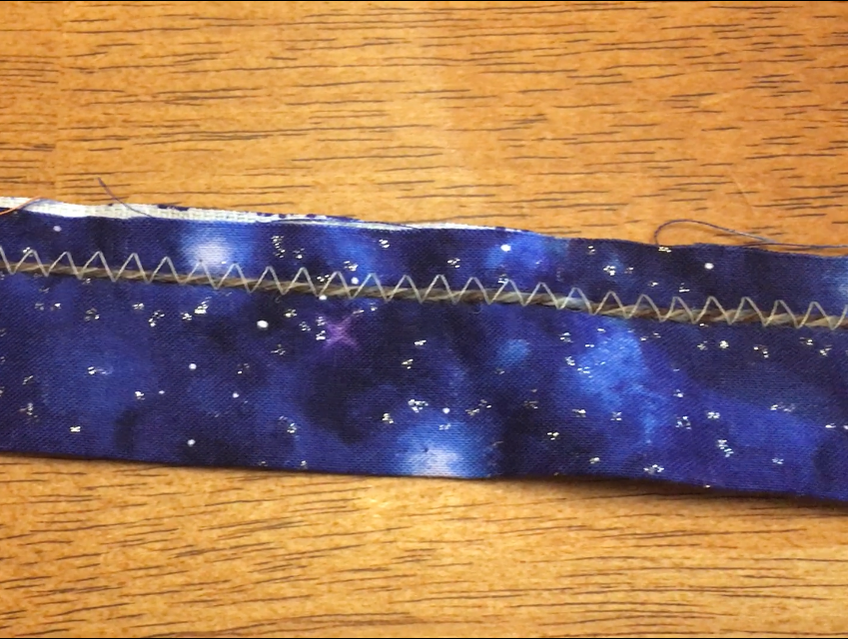
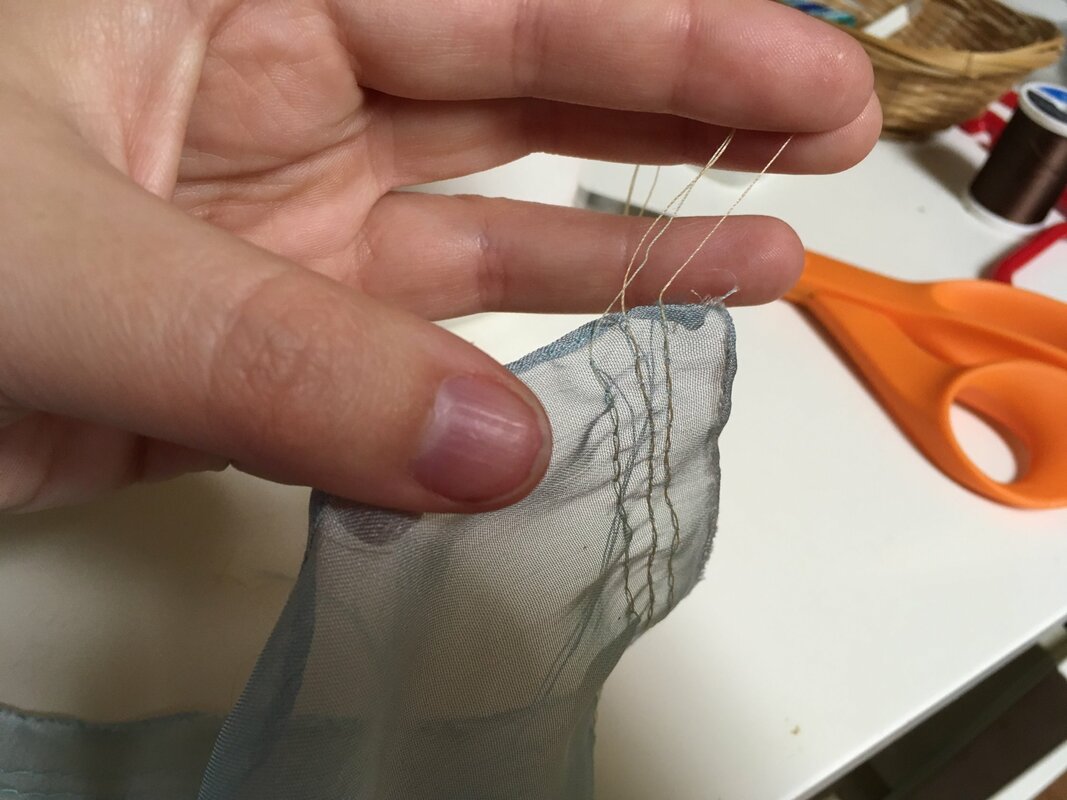
I always try to challenge myself to learn at least one new technique on every project, and even silly costumes like Nyan Cat are no exception! One of the many techniques I learned for this costume was rectangular ruffles; would you believe I haven’t made *any* ruffles in my five years as a cosplayer? I know, I was surprised too. 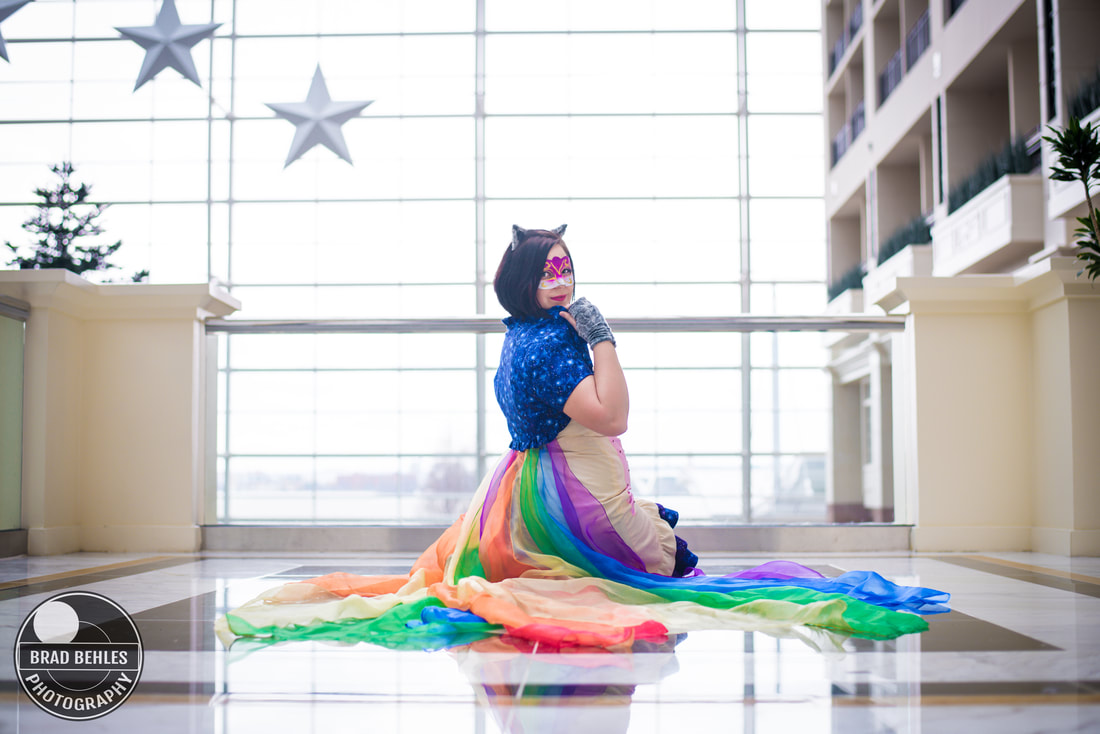 I had experiment a bit to make all the different ruffles on the costume, as the efficacy of any single technique depends on the ruffle you want to make! I used three different methods for wrangling the various fabrics that were part of NyanCat. Each method accomplishes approximately the same end result, but the approach used depends on the desired density of the ruffles, the weight of the fabric, and the patience of the person making them.
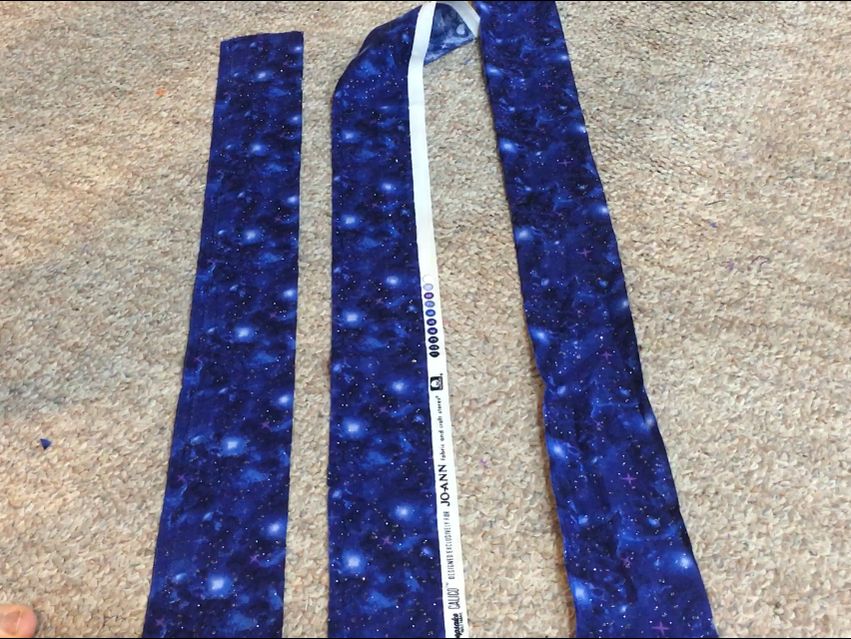
All my rectangular ruffles started the same way: with a long strip of fabric approximately 3 times the length of the desired ruffle and twice the width. (You know, like a rectangle.) If I need an extra long ruffle, I sew multiple strips together. Once the final ruffle length is reached, I fold the rectangle in half across its width and hem the edges.
Instead of cutting a double wide strip and folding it, you could simply hem the edge of your ruffles. This is ideal for ruffles hemmed with horsehair for a little extra bounce, or sheer ruffles that you want to keep light and breezy. Once your fabric is prepared, it’s time to gather! Method 1. Make the robot do it
Cut a few test strips from fabric scraps to get a feel for how your machine ruffles the fabric as it sews. Set up your machine to use a long, high-tension setting on your sewing machine. I usually ruffle with a 1/2" seam allowance; you can experiment to find out which seam allowance works best for you.
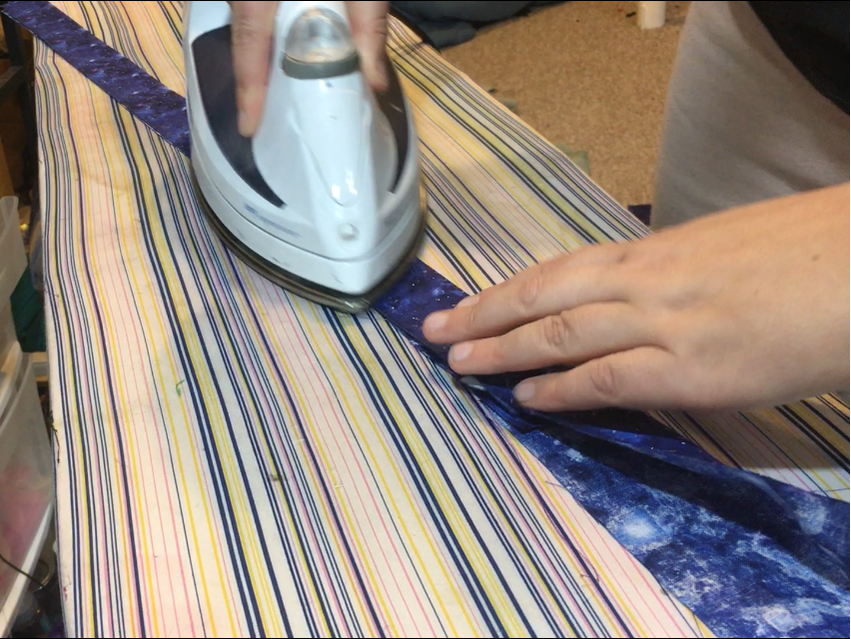
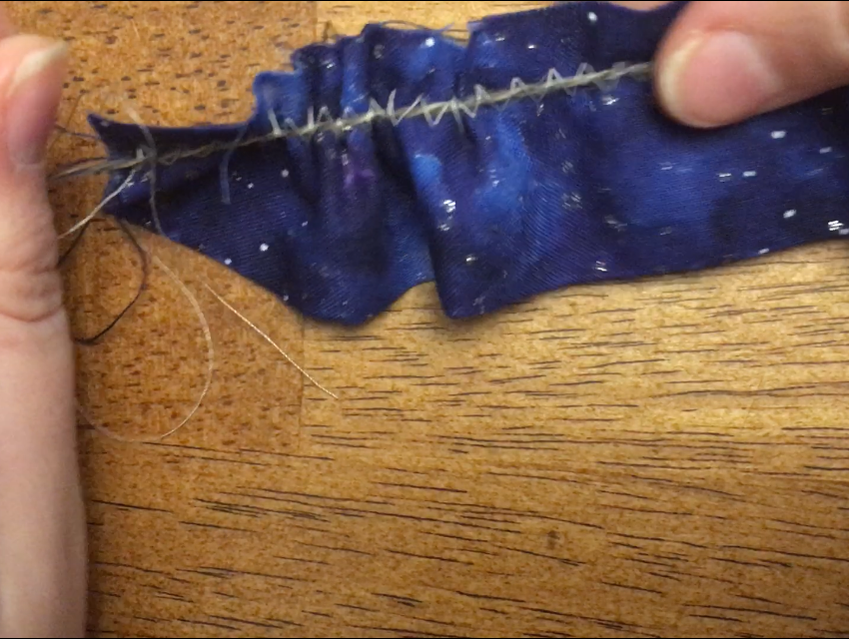
Once you've determined optimal settings, you're ready to ruffle for real! Insert your strip into the machine, backtack using the stitch reversing lever, and let 'er rip! Beautiful ruffles will pop right out of the machine, no questions asked. Once you're done ruffling the strip, backtack again, cut your threads, and sew to your project. 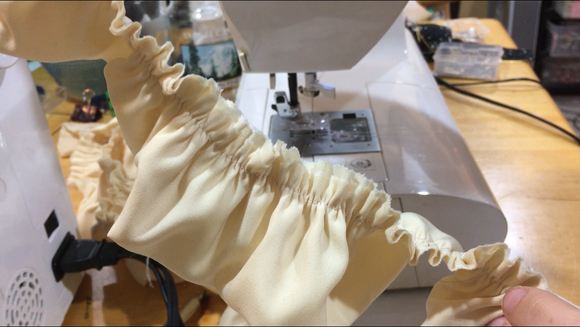 If you're having trouble getting this method to work, it's likely that the fabric you're trying to ruffle is too thick or stiff for the machine to take care of it on its own. If that's the case, you can try one of the methods below! Method 2. String theoryThis is my personal favorite way to gather fabric that can’t be gathered via the machine method. Start the same way you did with the machine-gathered ruffles, either by hemming or folding your strip.
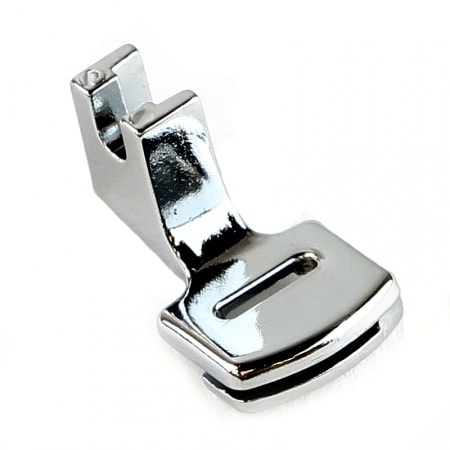
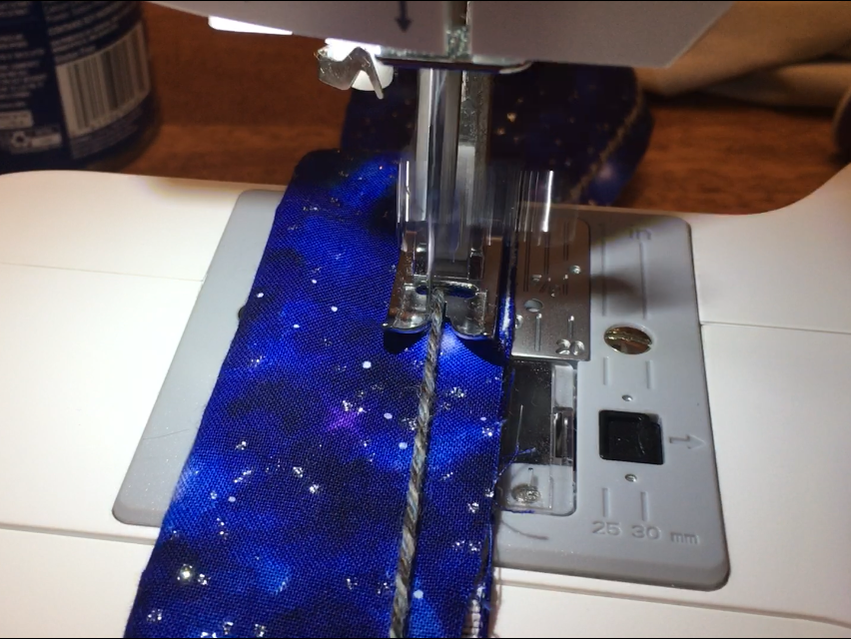
Next, cut a piece of string or yarn slightly longer than your un-ruffled fabric. Set your sewing machine to the widest zig-zag it can do, and put on a standard sewing foot with a split down the middle. T
The groove in the foot helps guide the string as you sew. If you have a Brother machine, you may have to source one separately, as the universal Brother foot has the groove on the left of the foot rather than the center.
Line up the edge of your fabric with the seam guide, and place your string directly underneath the middle of the foot. Then sew over the string, paying special attention to keep it from being caught in the zig-zag stitch.
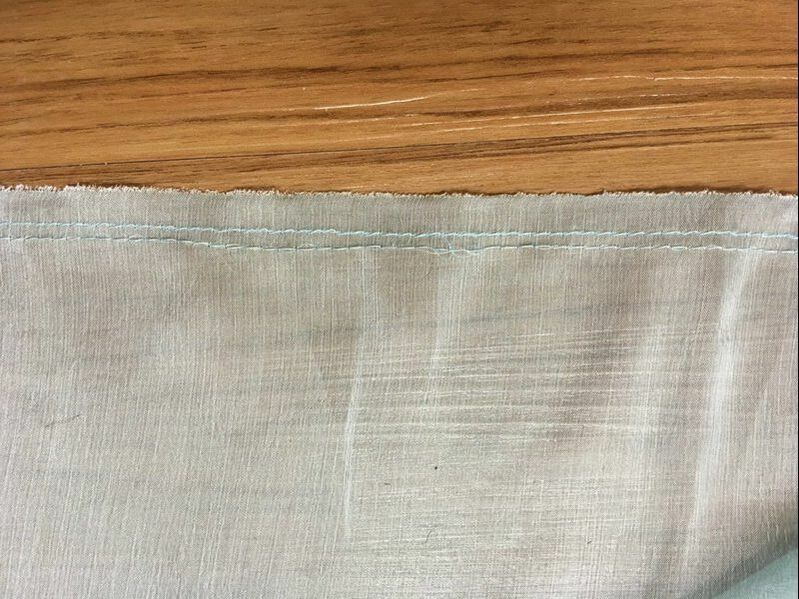
For a visualization of this technique, check out this video! It gives a quick overview of the steps, in less detail. Using a more delicate fabric and want more control over your gathers than the machine method? Basting by machine might be for you! Read on. Method 3. Basting Stitch LinesThis method is similar to the yarn gathering technique above, but you get a bit more control when gathering, as well as a flatter seam allowance, making this the neatest way to create ruffles. It is, however, the slowest of the three methods in this blog.
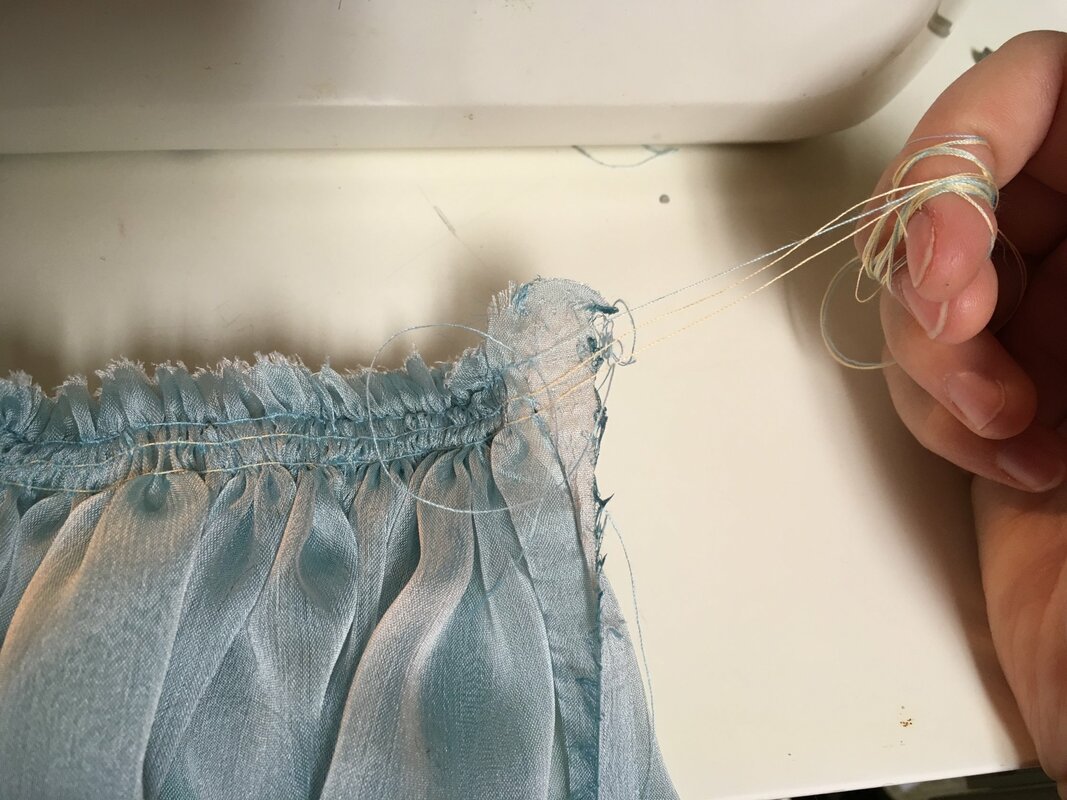
Set your sewing machine to the longest stitch and lowest tension. Leaving a nice long trailing thread, use your machine to stitch a continuous line along the length of your strip. At the end of the line of stitches, give yourself an extra 8-10 inches of thread. Note that this has to be one absolutely continuous line of thread. If your machine runs out of bobbin thread halfway through, or knots near the end of the stitch? Too bad. Pull out your stitches and start over.
Now make another line of stitching, approximately 3/8" below your first stitch line. You can do a third line 3/8" below that if you would like even more control over the gathers. As a general rule, I do two lines of gathering stitches for medium-weight fabrics and three lines of gathering stitches for sheer and very lightweight fabrics.
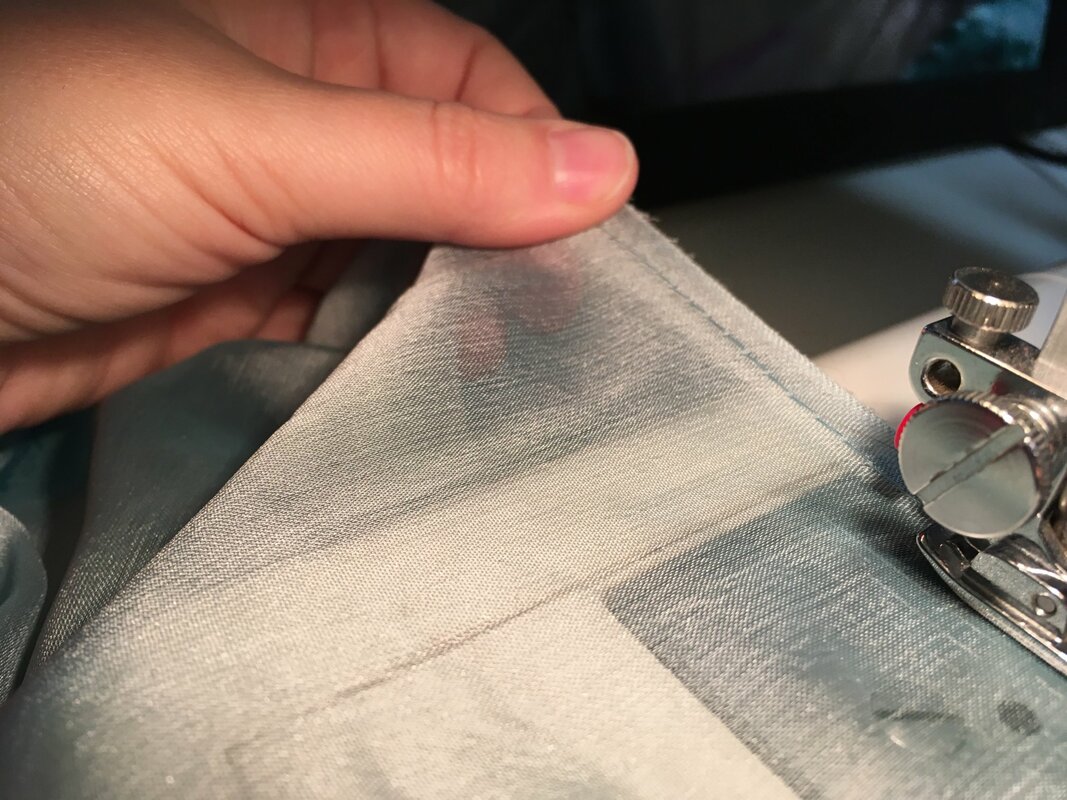
Now it’s time to gather! Locate the bobbin threads of your long stitches. Knot one end of the gathering stitches, then hold firmly onto the bobbin threads from the other end as you slide your fabric down them to create the gathers.
Once the fabric is the desired length, trim and knot the loose ends of the gathering stitches, evening out your gathers until there is approximately the same amount of ruffling along the entire length. Sew it to your project, and remove any basting stitches outside your seam allowance One advantage of this technique is keeping the seam allowance relatively flat. With the other two methods, the raw edge of the top of the ruffle can be incredibly unruly when pinning and sewing to your project, to the point that you end up with the raw edge outside the seam! You don't have this problem with the basting method. That's it for now!There are many, many ways to gather fabric and create ruffles, and I've only touched on a few here. You can also gather fabric with a serger, by hand, with elastic, and a multitude of other ways. Keep an eye out for other methods, and be willing to experiment with your sewing! Thank you for reading! I hope you find this tutorial useful -- and if you use any of my tutorials, please tag me on Instagram, Facebook, or Twitter so I can see your wonderful creations!
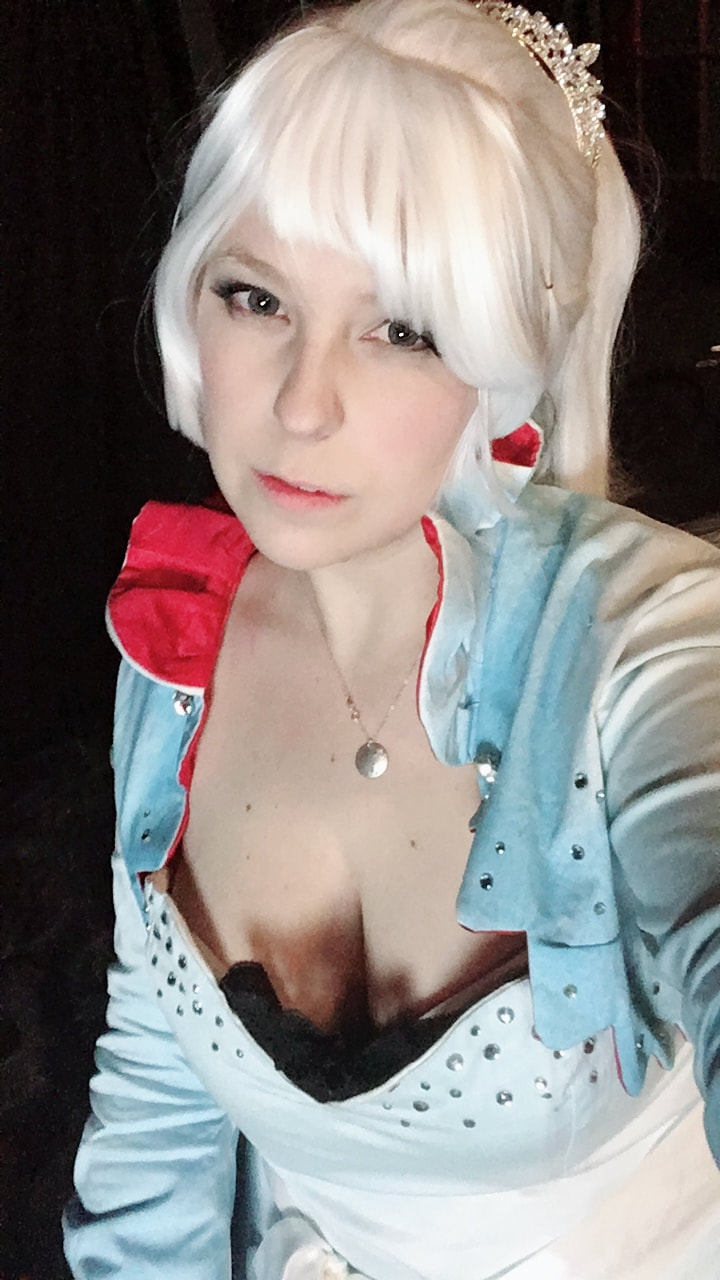
My stash of circle lenses has been dwindling, so I jumped at the opportunity when LensCircle asked me for a lens review! They sent me a pair of Nudy Series Circle Lenses in Blue, and I’ve worn them a handful of times now and feel like I can give a full and unbiased review! Full disclosure: LensCircle did send me these lenses for free in an exchange for this review. I have done my best to represent my experience with this company and their product as fairly as possible for you, my fellow cosplayer or cosplay enthusiast! Let's go ahead and take a look at these lenses, yeah? .... get it? *ahem* ANYWAY. BEHOLD, the lenses on my medium brown eyes, illuminated by a ring light! 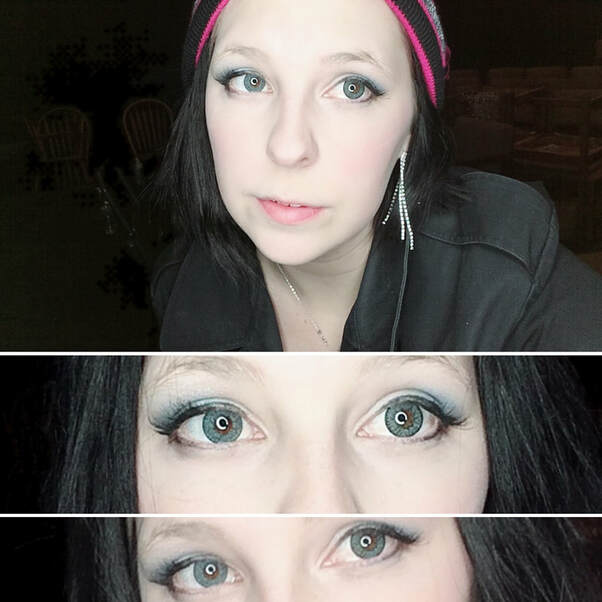 User Experience: 🌟🌟🌟The website itself is very easy to navigate. There's a sizable selection of lenses over a variety of both natural and unnatural colors. You can either search by brand or by color by using the handy-dandy navigational sidebar!  However, I was fairly disappointed by the lack of vibrant contacts available for those of us with unfocused eyeballs. Most lenses available in prescription are a much more "natural" look, which is great for everyday wear, but not necessarily for cosplay (more on this later!) I have a -4.00/-5.00 diopter prescription, which means I cannot function at a convention without either (a) having prescription contacts, or (b) carrying my glasses around and continually forgetting to take them off before photos.
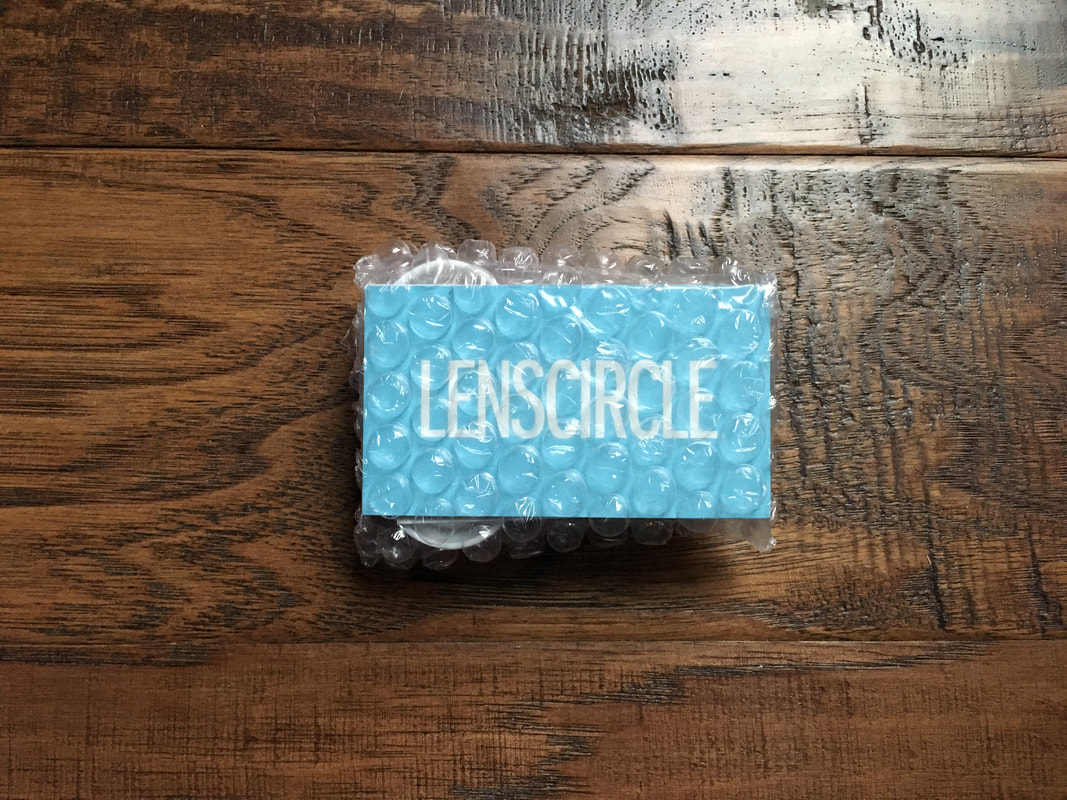
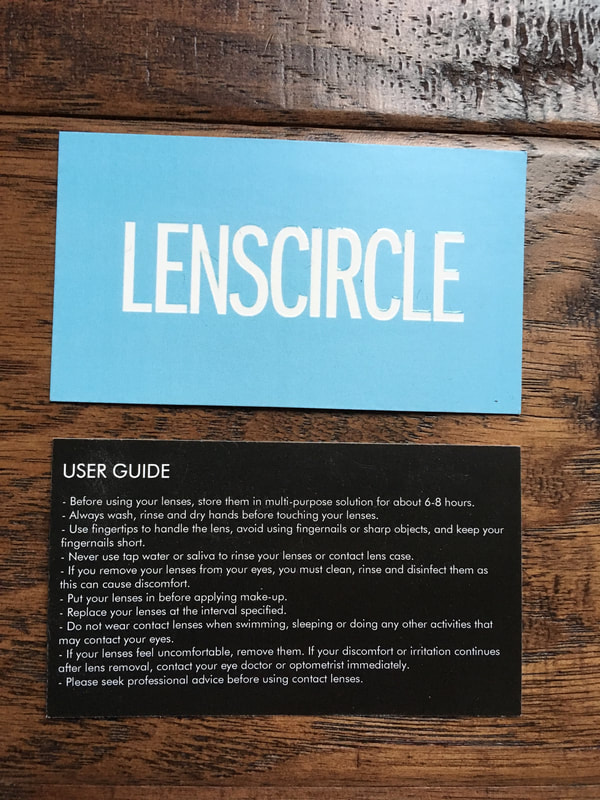
It me, stick-your-tongue-out-glasses-girl That being said, the selection was still quite varied, and I ran across very few, if any, lenses that were out of stock. I ended up choosing the blue Nudy Series Circle Lenses in Blue! The shipping took just two weeks, and I was very pleasantly surprised when the lenses arrived, as they came in a small carrying bag. I loved the cute, tidy, and professional packaging. The whole package included included:
I especially liked the user guide. Although I've been wearing contacts for over 15 years, it can be a new and confusing experience for many people the first time they wear them!
Comfort: 🌟🌟🌟🌟These lenses are very soft and pliable, making them easy to apply and wear! Every time I've worn them, I forgot that they were in my eyes. When I wore them to Kotoricon, I even forgot to take them out until bedtime -- I only remembered that they were in by eyeballs when I tried to take my glasses off before climbing under the covers. I do notice a bit of dryness at points throughout the day, but no major discomfort or pain! These are about as close, comfort-wise, to the clear contacts I wore constantly back when I had optical insurance. Color: 🌟🌟The color isn’t very pigmented, and all but disappears in the absence of strong lighting. That said, the color is a nice soft blue when the color *is* visible, as in the first photo. Despite the low pigmentation, they do have a subtle enlarging effect, making them perfect for everyday glam wear.
Can you tell I'm wearing them? These are good lenses for just wearing around town or for a chill day at a convention. However, I wouldn't recommend them to someone who was looking to change their eye color from brown to blue, as I was. I still enjoy these lenses and plan to wear them a lot, but I'll be getting a supplemental pair of blue lenses for when I really need the color to pop. Thanks for reading!
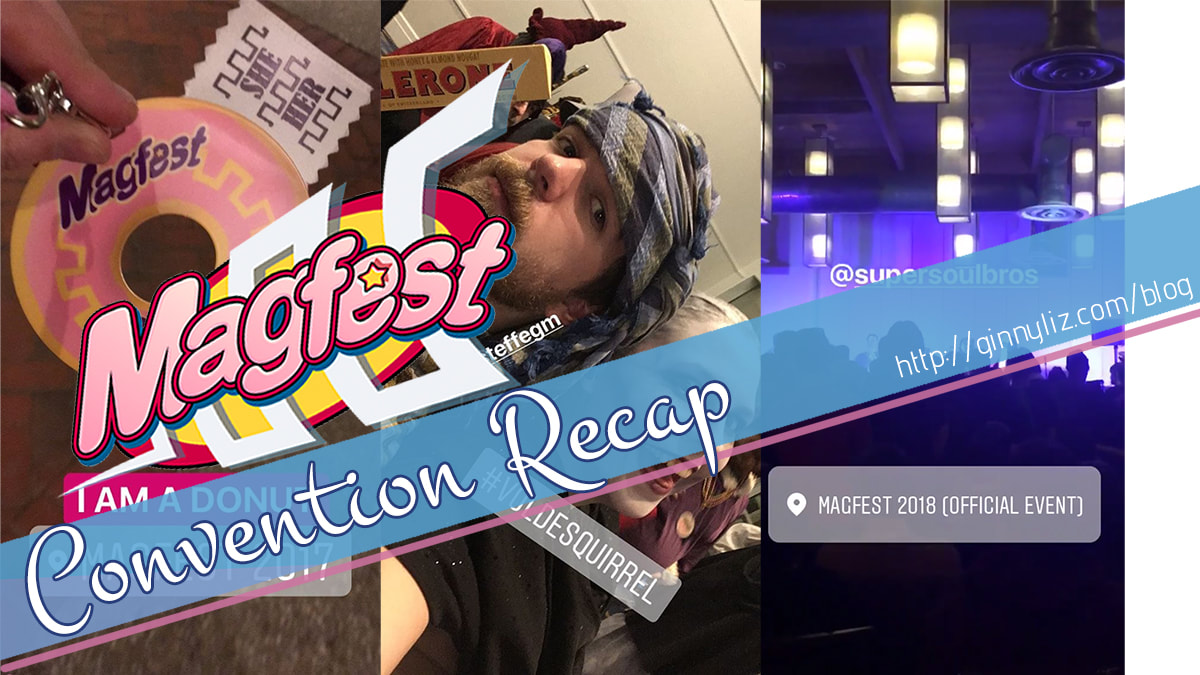 Time for the recap of my favorite convention of the year! This is my fourth MAGFest, my second year volunteering, and my first year as staff. It’s a party convention with board games, video games and friends, and I prepared appropriately.  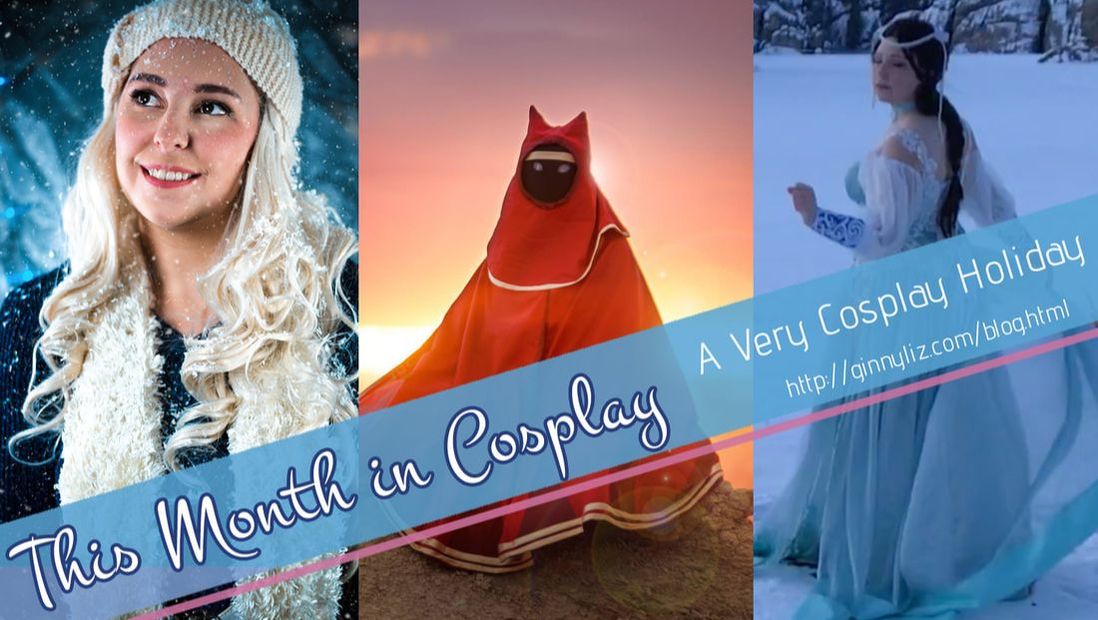 December was a busy month for me between travel and crafting! I did a TON of stuff, and January and February are also going to be insanely busy! Basically, the theme of this month was LOCATION SHOOTS! I visited to the Black Hills of South Dakota for the holidays, and the area around my childhood hometown has some incredible locations for photo shoots. I connected with some talented members of the cosplay community in my hometown and we collaborated on some AMAZING stuff.
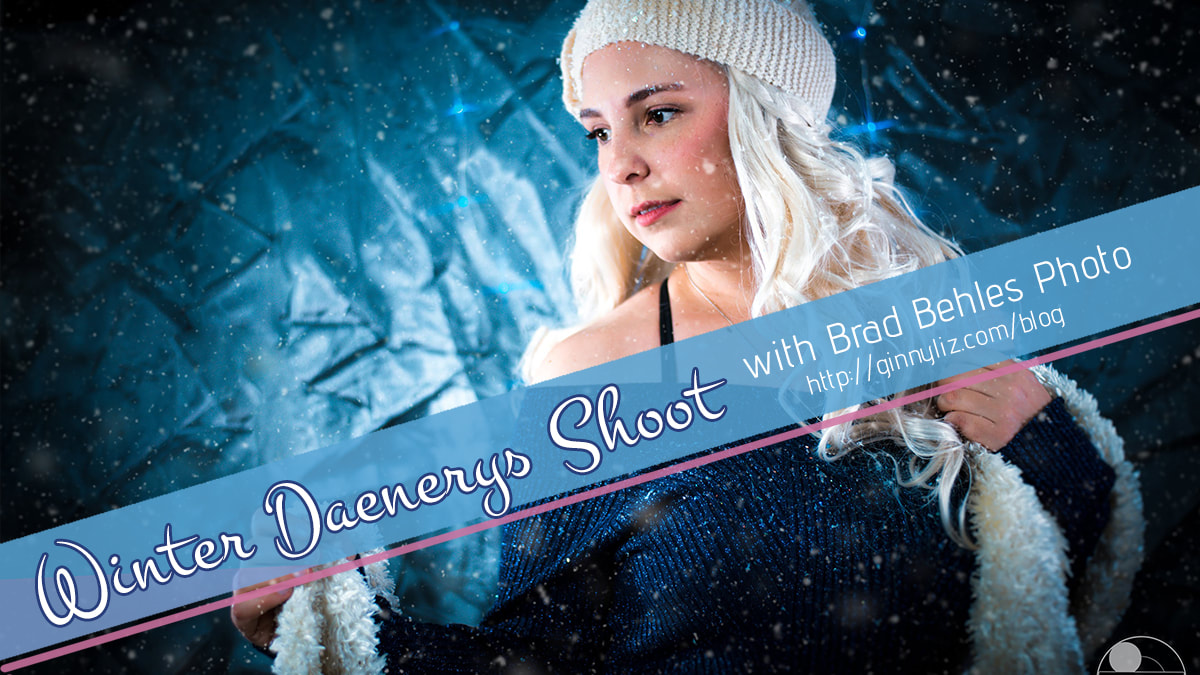 This is from a Christmas shoot with Brad Behles Photography! He wanted to do a fun Christmasy shoot, I had a new dress and a fancy white-blonde wig, so we got together, set up an in-home studio, and started shooting! This shoot was very different than the ones I'm used to. It was essentially an in-character fashion shoot, which meant I was the *only* thing of interest in the frame. I had to focus a ton of effort into my posing and expressions, rather than letting the costume do most of the work. Overall, it was a new experience and I learned a lot from it. Even if I wasn't in character 100% of the time.
ReplayFX is a game con centered around gaming competitions with an emphasis on arcade games and pinball, but also includes great nerdy musicians (Triforce Quartet). They've been trying to increase the cosplay presence over the last few years, and have done a great job with a high-stakes cosplay competition and phenomenal guests! I wanted to go to ReplayFX in 2016, but wasn't able to make it due to a schedule conflict. This year, I made sure to clear my schedule! This year they also hosted ToonFest, the yearly meeting of Toontown Rewritten's fans and developers. As someone who played Toontown throughout all of college as a way to keep in touch with my sister, I had a BLAST at their booth playing with the Gags and coloring Cogs and getting exclusive item codes! I only cosplayed on Saturday (as Hannah Alexander Squirtle), and that was a wise decision. As much as I love cosplay, it's really hard to play video games and giant Connect 4 when you're worried about your makeup smearing, your wig tangling, etc. On Sunday, I stole friends for photoshoots (I'll make sure to post some photos here when they're all edited!)
Highlights
GalleryI also made it into Zadra's HulaCam video! (Heck, I made the cover!) 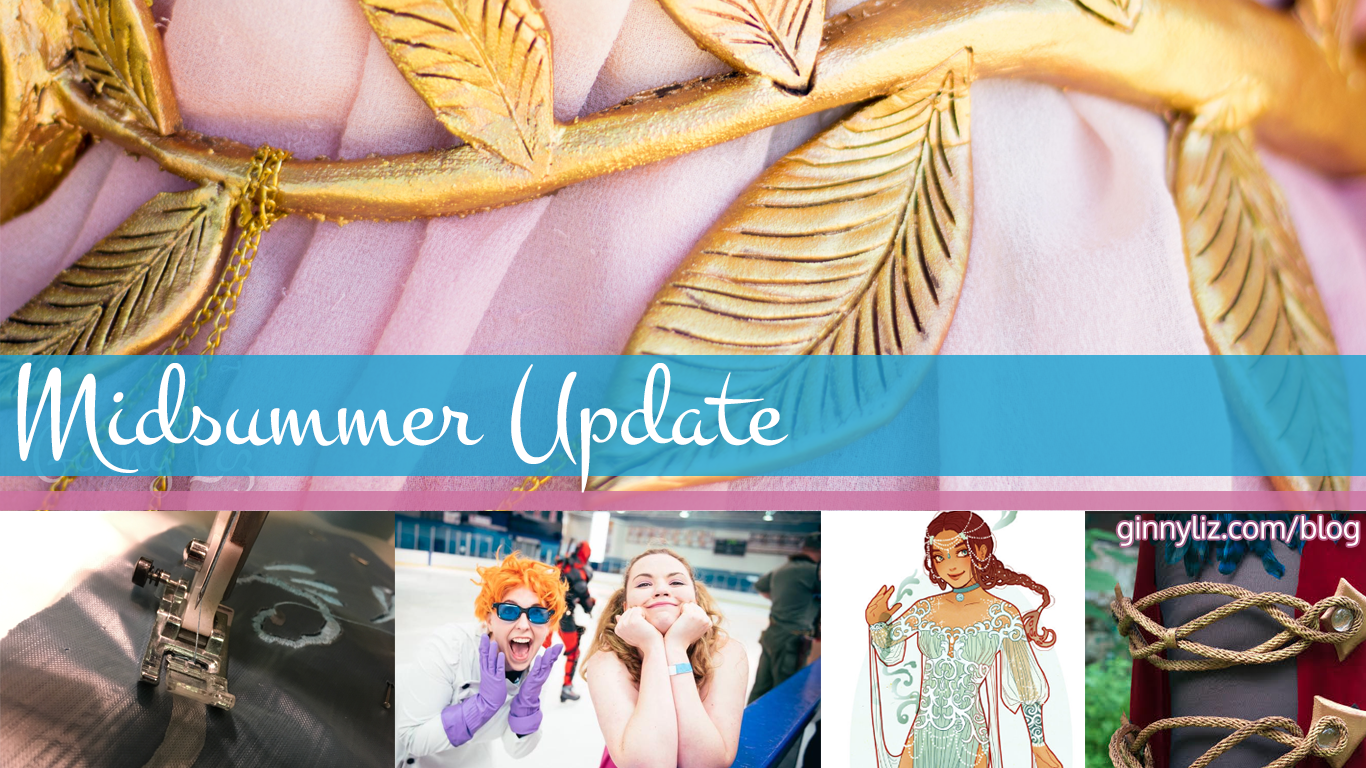 Hello friends! A lot has been changing lately, so I wanted to give you a few updates on how life is in the Ginnysphere. I'm trying to revive my blog (you may have noticed the year-long hiatus). As a part of that, I want to introduce a new regular post: monthly updates! It's kind of like a monthly newsletter, delivered right to my site! Each month will include my most recent shenanigans, including convention attendance, costume progress, new photoshoots, and whatever else I've been working on! Since I haven't been overly active on social media since, like... May, we'll do a recap of the summer thus far.
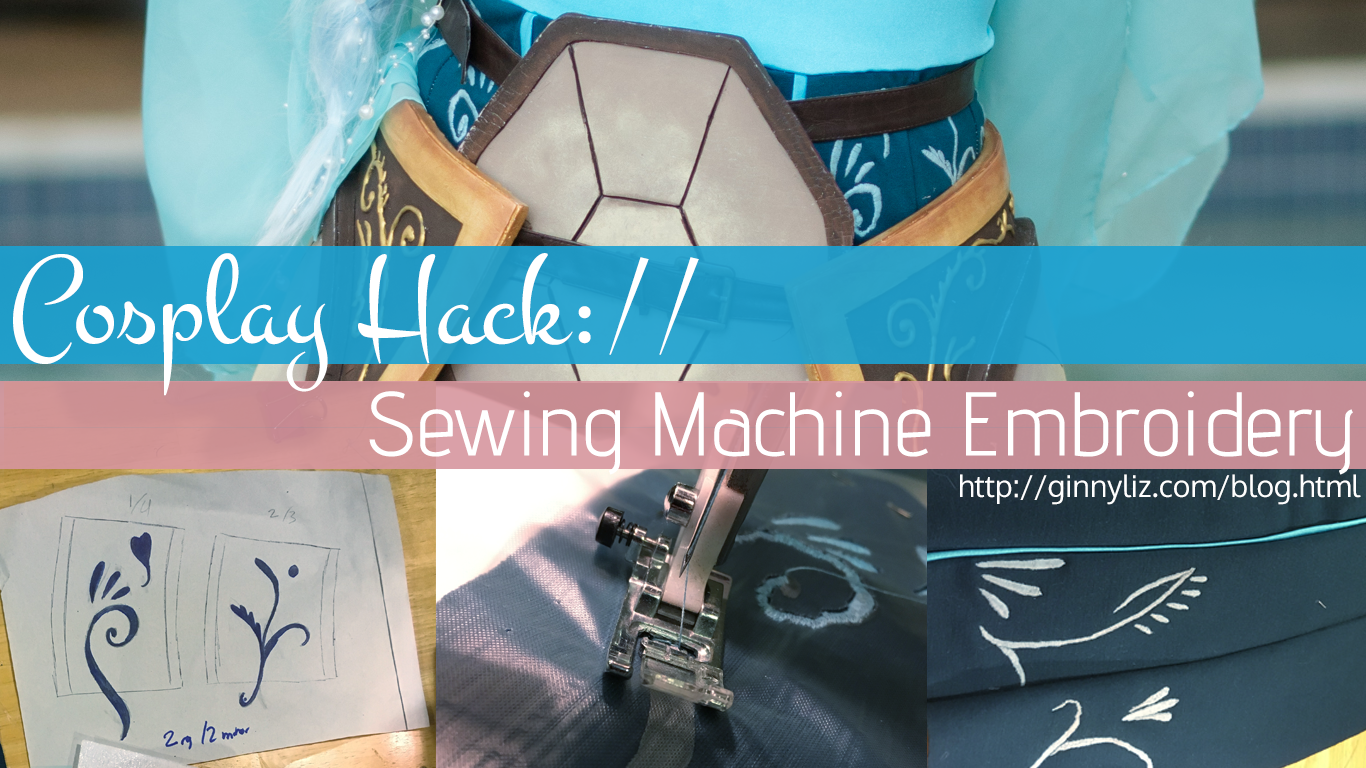 Have you ever looked longingly at the embroidery machines whenever you pass by them during your weekly fabric run? Promised to spend less on fabric so you could afford such a magical machine (and then never manage to do so)? Wish you didn't have to do embroidery by hand? I am here to save you! In this tutorial, I'll be explaining how to make beautiful embroidery using the basic sewing machine you already own! I used this method to do all of the embroidery on my Hannah Alexander Squirtle costume. I'll be putting the patterns I used up for sale in my store soon, so keep an eye out! Prints are also up for sale in my store during the month of July. Every order gets a free mini-print! If you've ever wanted to hang my face on your wall, now is the time. Okay, enough self-promotion. On to the tutorial!
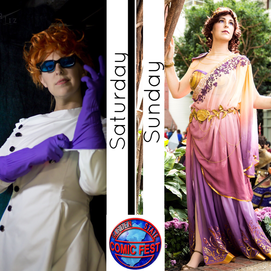
My first Garden State Comic Fest was in 2015, two years ago, and I was really excited to return! GSCF, held in Morristown, NJ, has a really chill, mature environment, the guests are high quality, the vendors are unique, and they always put on a really great show. It's the only con I've ever heard of that's held in an ice rink, which is a convenient way to beat the July heat! They've recently expanded their programming to include cosplay ice skating, a two-hour event where cosplayers get to skate around in their costumes. It's pretty great.
Highlights
Make sure to check out the gallery from the event below! |
CosblogA weird mash-up of physics, math, education, sewing, and stanning Hordrapta Categories
All
Archives
April 2019
|


 RSS Feed
