|
I always try to challenge myself to learn at least one new technique on every project, and even silly costumes like Nyan Cat are no exception! One of the many techniques I learned for this costume was rectangular ruffles; would you believe I haven’t made *any* ruffles in my five years as a cosplayer? I know, I was surprised too. 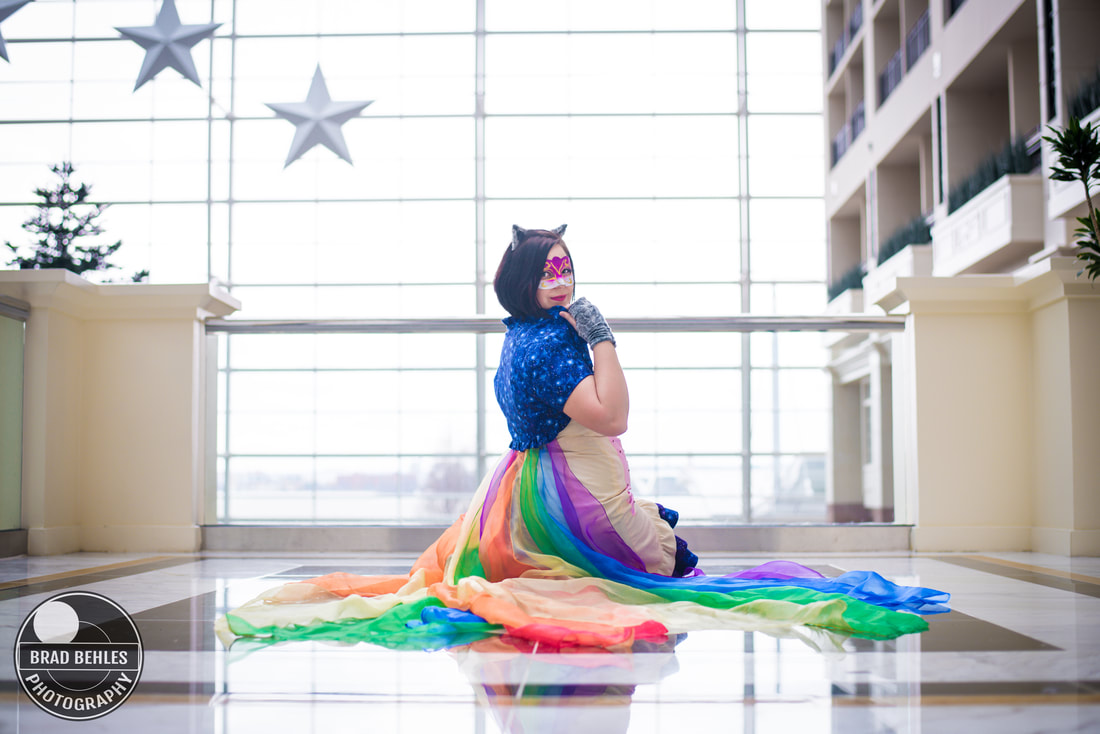 I had experiment a bit to make all the different ruffles on the costume, as the efficacy of any single technique depends on the ruffle you want to make! I used three different methods for wrangling the various fabrics that were part of NyanCat. Each method accomplishes approximately the same end result, but the approach used depends on the desired density of the ruffles, the weight of the fabric, and the patience of the person making them.
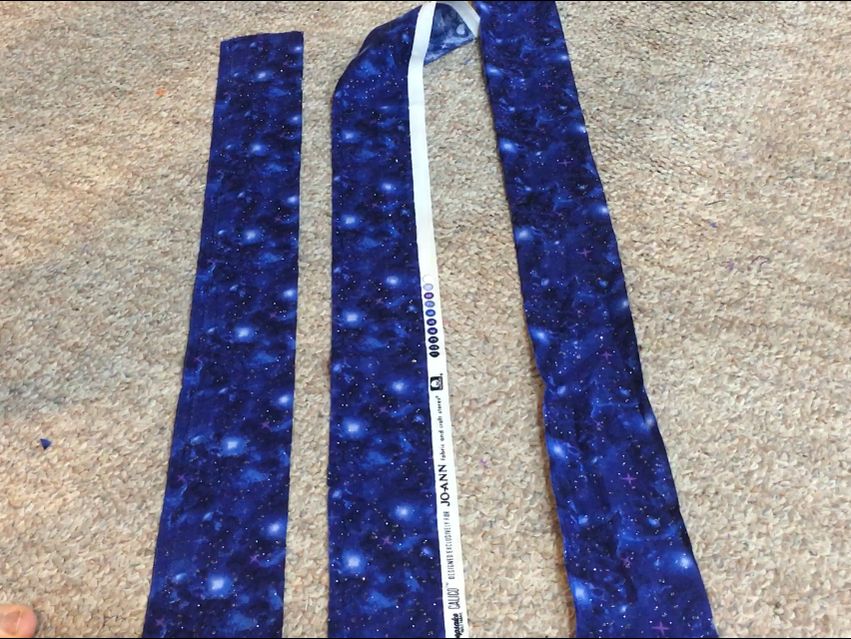
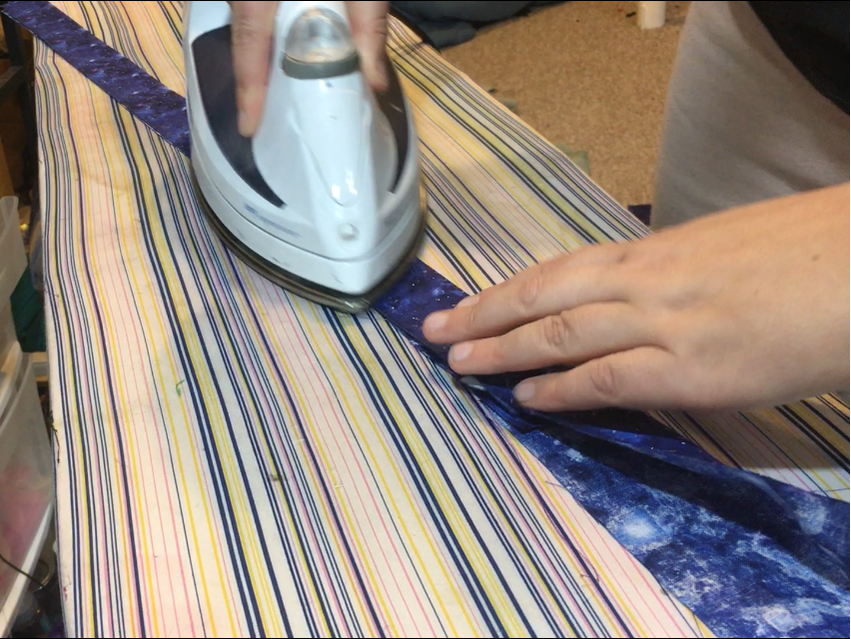
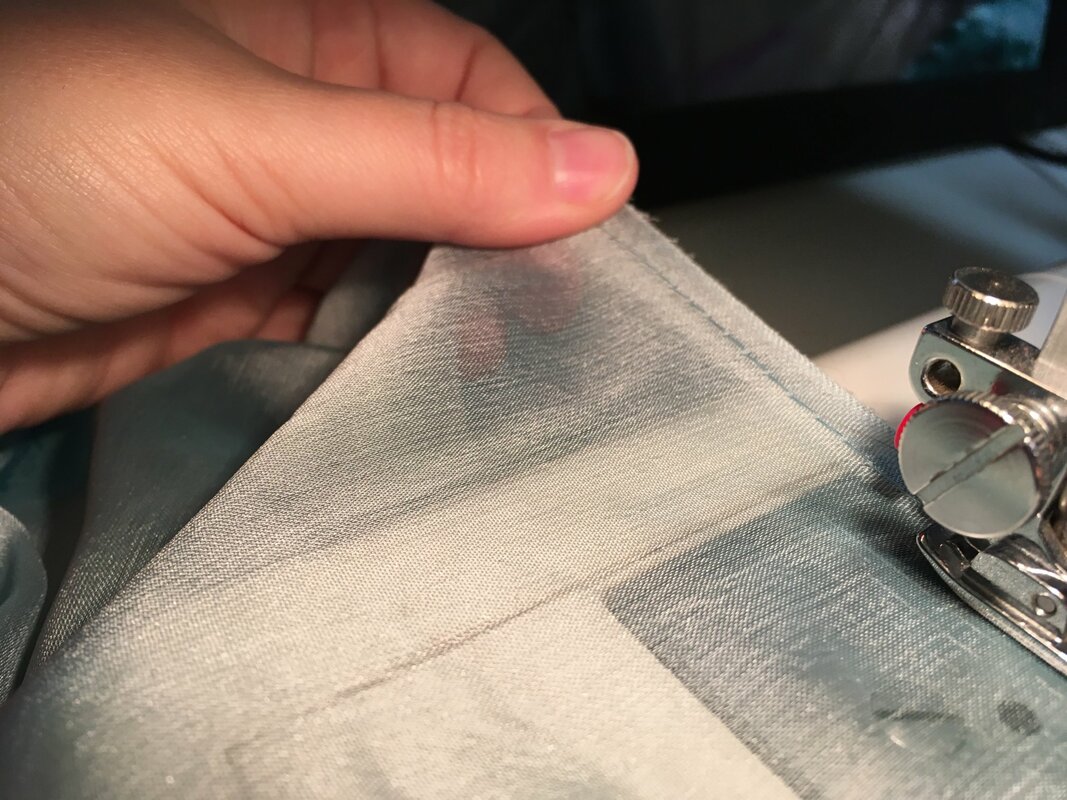
All my rectangular ruffles started the same way: with a long strip of fabric approximately 3 times the length of the desired ruffle and twice the width. (You know, like a rectangle.) If I need an extra long ruffle, I sew multiple strips together. Once the final ruffle length is reached, I fold the rectangle in half across its width and hem the edges.
Instead of cutting a double wide strip and folding it, you could simply hem the edge of your ruffles. This is ideal for ruffles hemmed with horsehair for a little extra bounce, or sheer ruffles that you want to keep light and breezy. Once your fabric is prepared, it’s time to gather! Method 1. Make the robot do it
Cut a few test strips from fabric scraps to get a feel for how your machine ruffles the fabric as it sews. Set up your machine to use a long, high-tension setting on your sewing machine. I usually ruffle with a 1/2" seam allowance; you can experiment to find out which seam allowance works best for you.
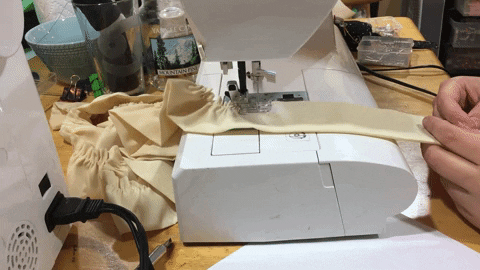
Once you've determined optimal settings, you're ready to ruffle for real! Insert your strip into the machine, backtack using the stitch reversing lever, and let 'er rip! Beautiful ruffles will pop right out of the machine, no questions asked. Once you're done ruffling the strip, backtack again, cut your threads, and sew to your project. 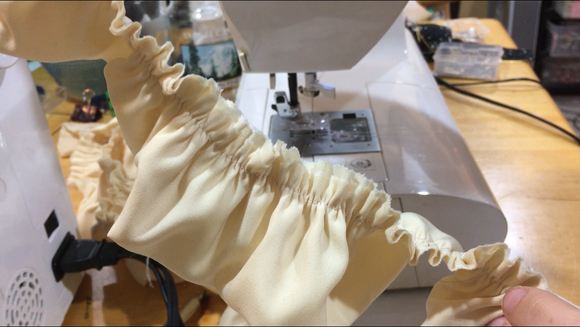 If you're having trouble getting this method to work, it's likely that the fabric you're trying to ruffle is too thick or stiff for the machine to take care of it on its own. If that's the case, you can try one of the methods below! Method 2. String theoryThis is my personal favorite way to gather fabric that can’t be gathered via the machine method. Start the same way you did with the machine-gathered ruffles, either by hemming or folding your strip.
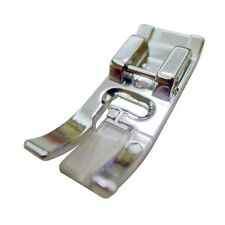
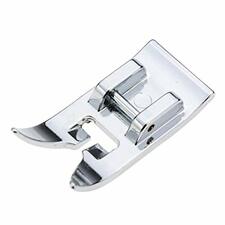
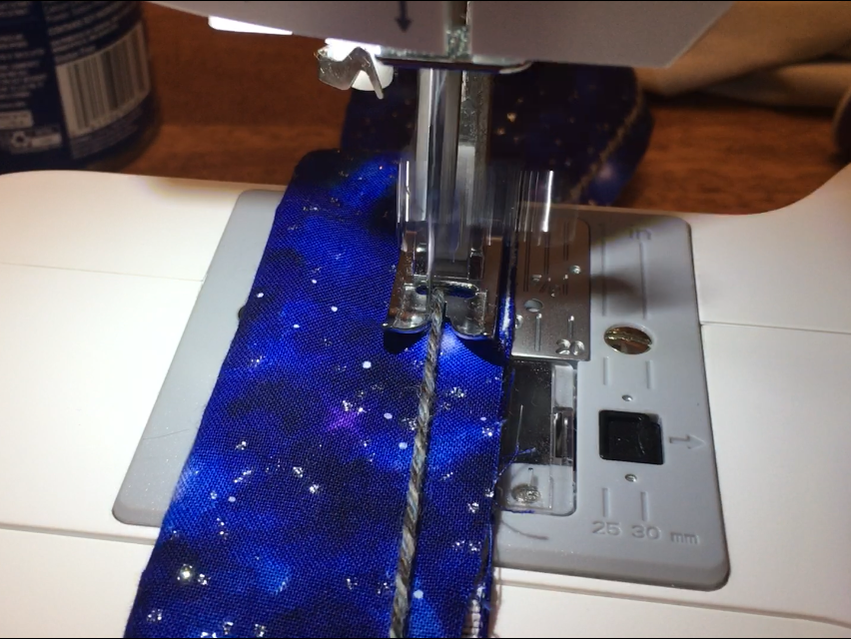
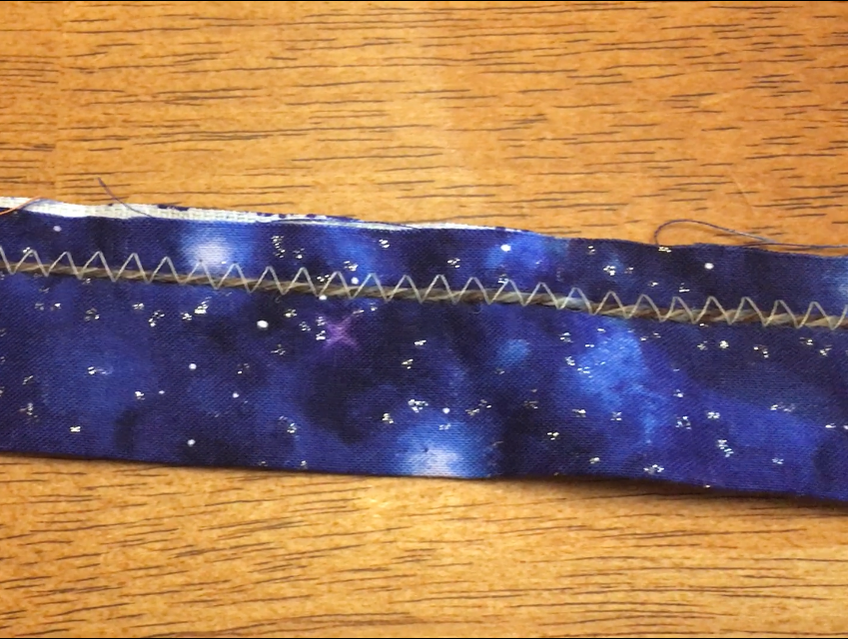
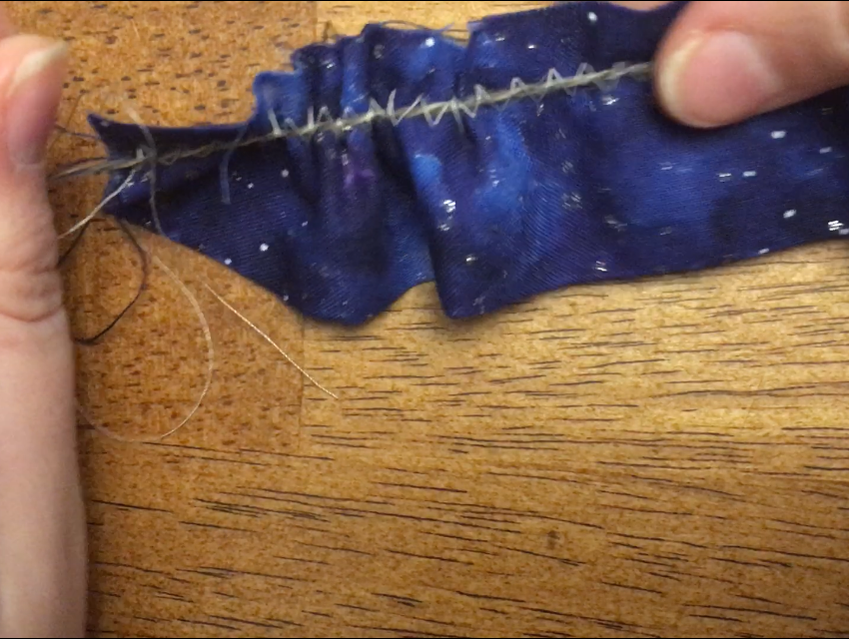
Next, cut a piece of string or yarn slightly longer than your un-ruffled fabric. Set your sewing machine to the widest zig-zag it can do, and put on a standard sewing foot with a split down the middle. T
The groove in the foot helps guide the string as you sew. If you have a Brother machine, you may have to source one separately, as the universal Brother foot has the groove on the left of the foot rather than the center.
Line up the edge of your fabric with the seam guide, and place your string directly underneath the middle of the foot. Then sew over the string, paying special attention to keep it from being caught in the zig-zag stitch.
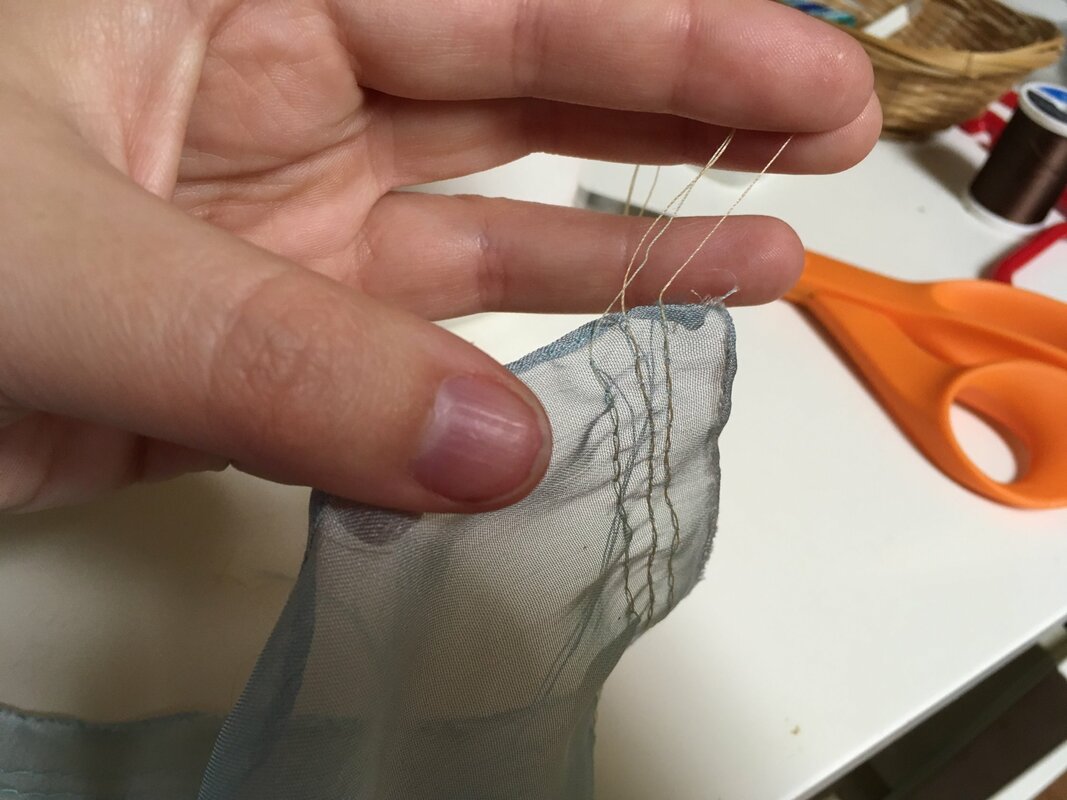
For a visualization of this technique, check out this video! It gives a quick overview of the steps, in less detail. Using a more delicate fabric and want more control over your gathers than the machine method? Basting by machine might be for you! Read on. Method 3. Basting Stitch LinesThis method is similar to the yarn gathering technique above, but you get a bit more control when gathering, as well as a flatter seam allowance, making this the neatest way to create ruffles. It is, however, the slowest of the three methods in this blog.
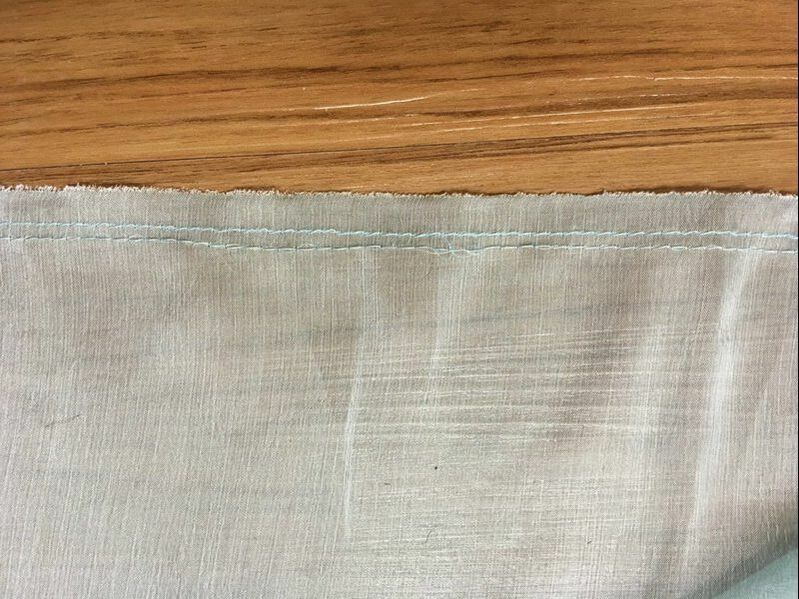
Set your sewing machine to the longest stitch and lowest tension. Leaving a nice long trailing thread, use your machine to stitch a continuous line along the length of your strip. At the end of the line of stitches, give yourself an extra 8-10 inches of thread. Note that this has to be one absolutely continuous line of thread. If your machine runs out of bobbin thread halfway through, or knots near the end of the stitch? Too bad. Pull out your stitches and start over.
Now make another line of stitching, approximately 3/8" below your first stitch line. You can do a third line 3/8" below that if you would like even more control over the gathers. As a general rule, I do two lines of gathering stitches for medium-weight fabrics and three lines of gathering stitches for sheer and very lightweight fabrics.
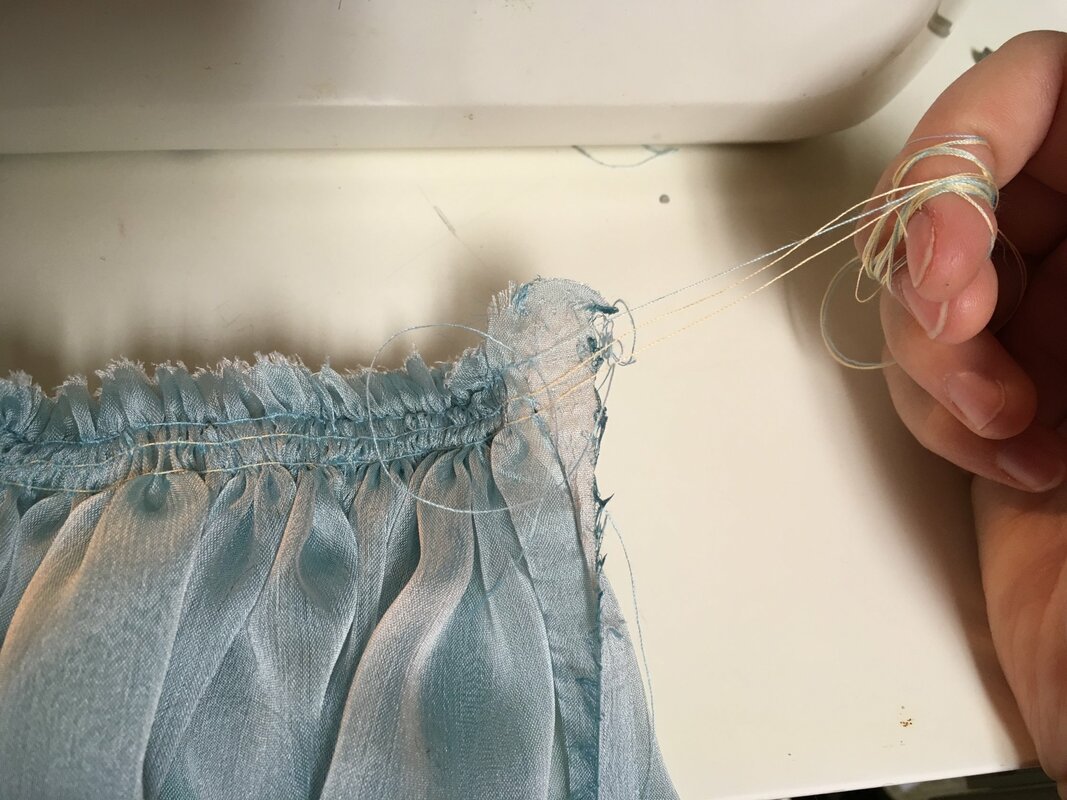
Now it’s time to gather! Locate the bobbin threads of your long stitches. Knot one end of the gathering stitches, then hold firmly onto the bobbin threads from the other end as you slide your fabric down them to create the gathers.
Once the fabric is the desired length, trim and knot the loose ends of the gathering stitches, evening out your gathers until there is approximately the same amount of ruffling along the entire length. Sew it to your project, and remove any basting stitches outside your seam allowance One advantage of this technique is keeping the seam allowance relatively flat. With the other two methods, the raw edge of the top of the ruffle can be incredibly unruly when pinning and sewing to your project, to the point that you end up with the raw edge outside the seam! You don't have this problem with the basting method. That's it for now!There are many, many ways to gather fabric and create ruffles, and I've only touched on a few here. You can also gather fabric with a serger, by hand, with elastic, and a multitude of other ways. Keep an eye out for other methods, and be willing to experiment with your sewing! Thank you for reading! I hope you find this tutorial useful -- and if you use any of my tutorials, please tag me on Instagram, Facebook, or Twitter so I can see your wonderful creations!
1 Comment
 If there were only two cartoon shows I could recommend to anyone, no more, no less, my choices would be Avatar: The Last Airbender and Young Justice. Very different shows, but both have an interesting world, a compelling storyline, and incredibly fascinating characters that develop very naturally as the show progresses.
I can understand why Young Justice was canceled (although I’m still not happy about it). It got really dark near the end of the second season; it became a teen/adult show, rather than the target audience of the channel it was aired on. But the darkness and character growth is so fantastically written and voice acted and the ending… just… feels. If you haven’t watched Young Justice yet, go watch it. I’ll wait. ... All caught up? Excellent, we can continue. Note: this tutorial was transported over from the old Wordpress site, which is no longer active.  I went into Frozen with absolutely no idea on the main plot. The only thing I had to go on was the recommendations of others and the teaser trailer with Olaf and Sven. Needless to say, I was completely blown away by the film, characters, and, of course, the costumes!
As an older sister and as someone who has struggled with imposter syndrom in the past, I really identified with Elsa. I decided to make both of her major outfits: her coronation gown and Snow Queen gown. I’m in the process of making the coronation gown, but the coronation cape has been done for a while, so I decided I might as well write a post about it! This post will cover the making of the cape. Note: this tutorial was transported over from the old Wordpress site, which is no longer active. I read the Hunger Games books about three years ago. I enjoyed them quite a bit; they were a quick read with page-turning intensity. The world Suzanne Collins created captured me, even if her writing style was not quite to my taste. Then the movies started coming out. It’s a very rare occasion that I enjoy the movie adaptation more than the books, but when it came to the world of Panem, oh boy did the creators of the film do it justice, and then some. I was completely blown away by the acting, cinematography, directions, and of course, the costumes. In particular, Cinna’s extravagant yet tasteful Capitol designs. I love how they were able to blend futuristic fashion with cinematic effects to make each of Katniss’s outfits captivating yet still on the verge of possible. I was doing a re-watch of Catching Fire about a month before the premiere of Mockingjay, in particular, the Quarter Quell parade scene. and something possessed me and I thought, I could totally make that dress. You know, the one that looks like glowing embers. 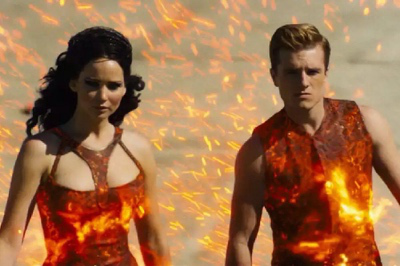 Yup. Totally doable. Note: this tutorial was transported over from the old Wordpress site, which is no longer active. Welcome to my first “official” cosplay write-up. I will do these for a few of my costumes to both help out other cosplayers and to have a place to show my progress! I premiered Avatar Kyoshi last Saturday at Wizard World Philadelphia. I had a blast! I’m still trying to track down some pictures that people took of me. 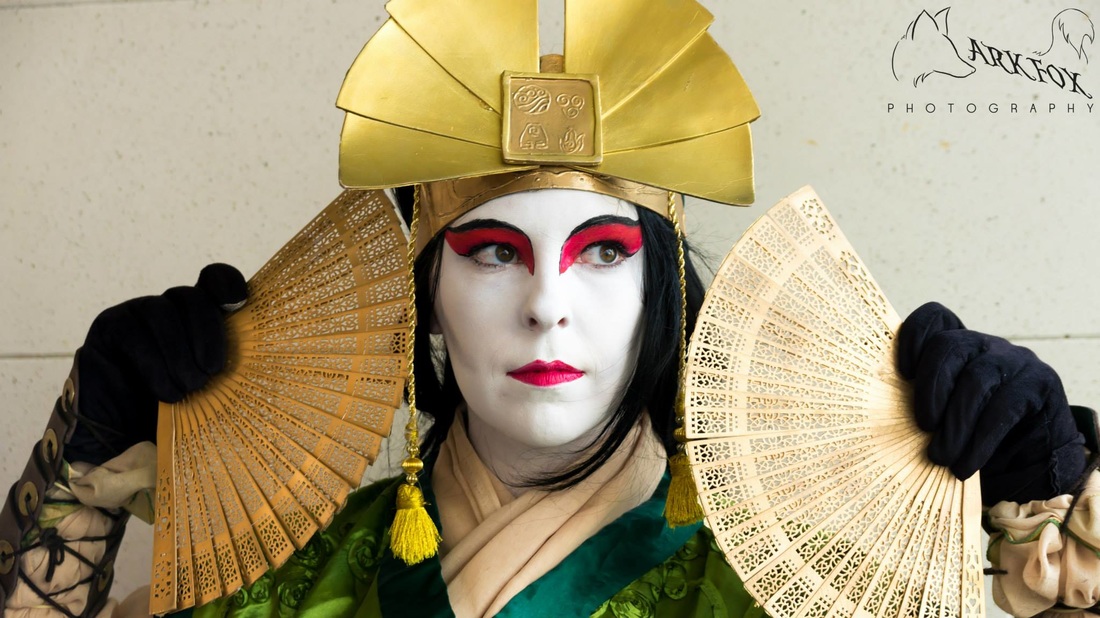 This post covers the accessories: Kyoshi’s bracers, obi, and headdress. A few things to note before I get started:
|
CosblogA weird mash-up of physics, math, education, sewing, and stanning Hordrapta Categories
All
Archives
April 2019
|

 RSS Feed
