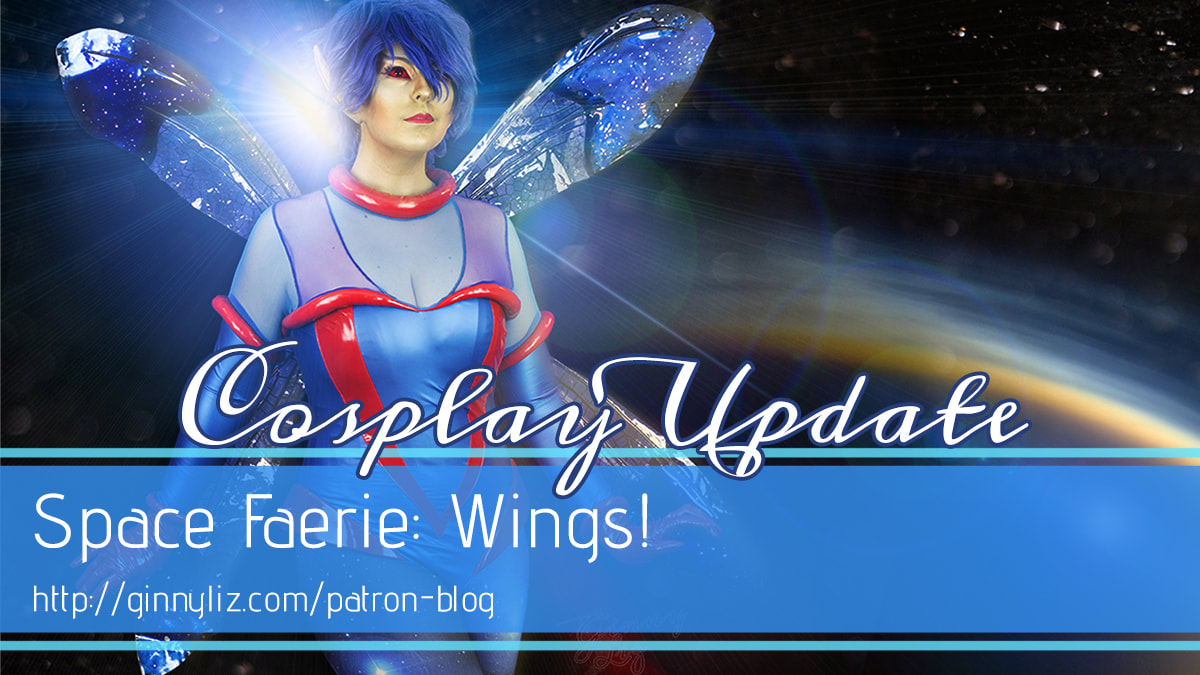
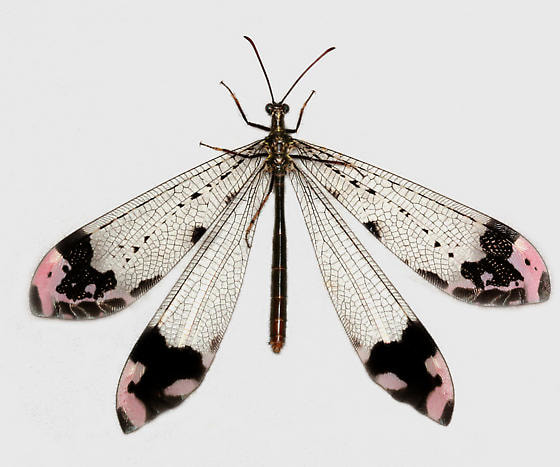
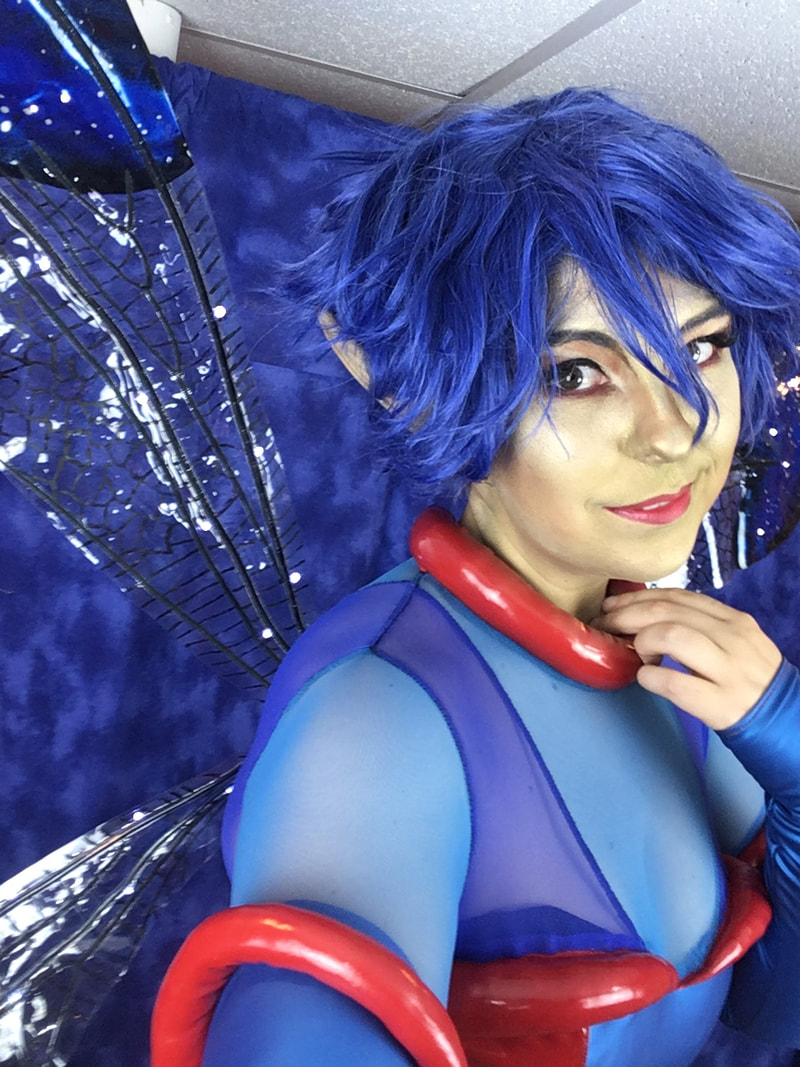
 The final chapter of the Space Faerie saga: the wings! As I mentioned in the last post, I based the wing design on an insect glenurus gratus, a species of antlion whose larvae are decidedly cooler than the winged adult version. Leaving that aside for now, here's what they look like:
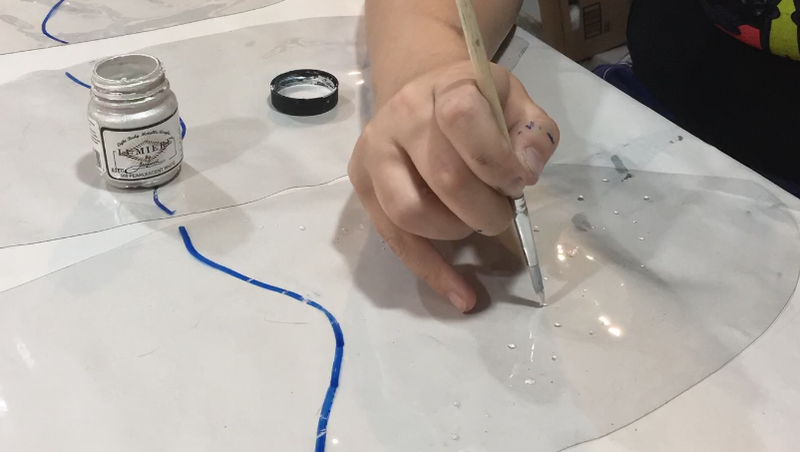
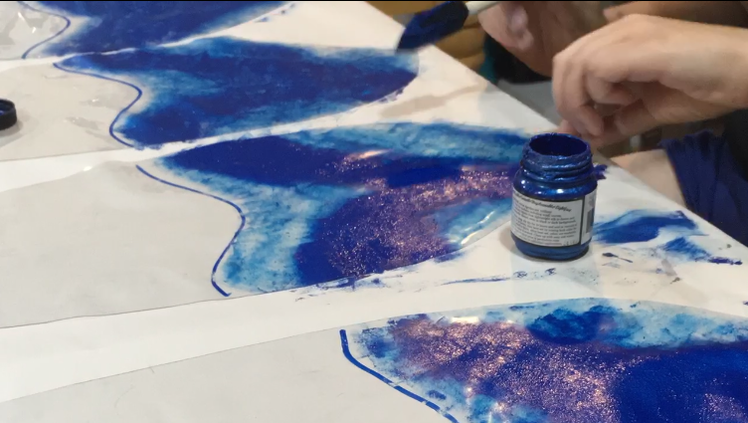
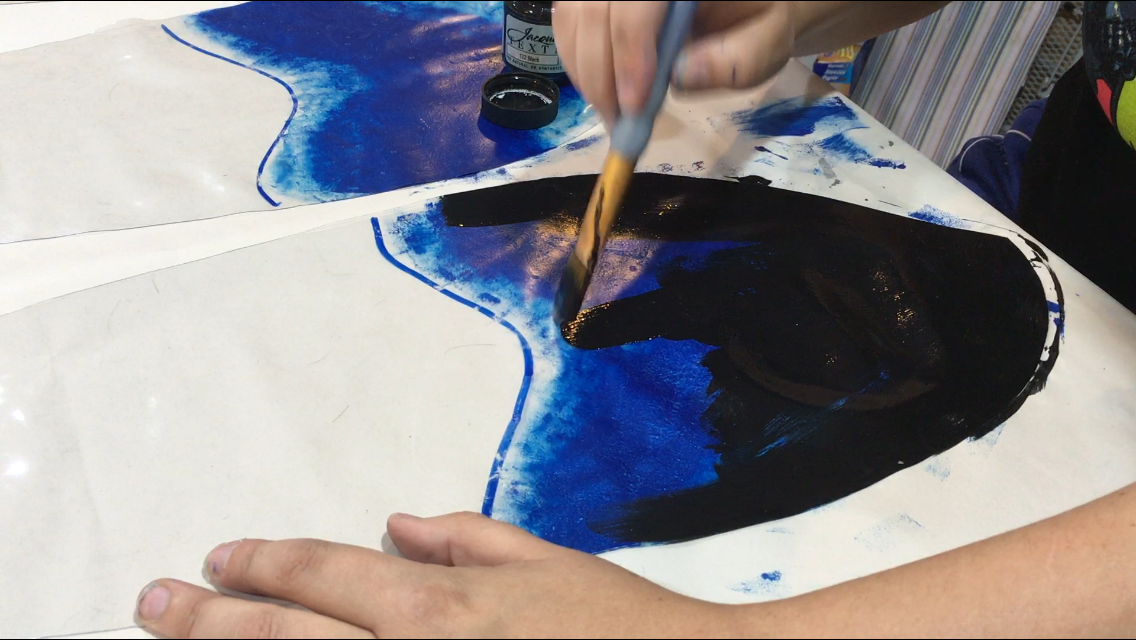
I saw this insect's wing and my brain immediately jumped to nebulae, or stellar nurseries of dust and gas where stars are being born! Hence, perfect for space shenanigans. I was at a loss as to how to actually *construct* the wings for the longest time. Cellophane? Too flimsy and hard to work with. I finally settled on an entirely new method, one that I haven't seen at all throughout my internet travels! I used clear vinyl in a fabric weight, only about 1mm thick. I started by printing out my digital pattern onto printer paper and taping it together. I went with a wing length of about 28", the same length as my "travel" wings that I took to Denver Comic Con. 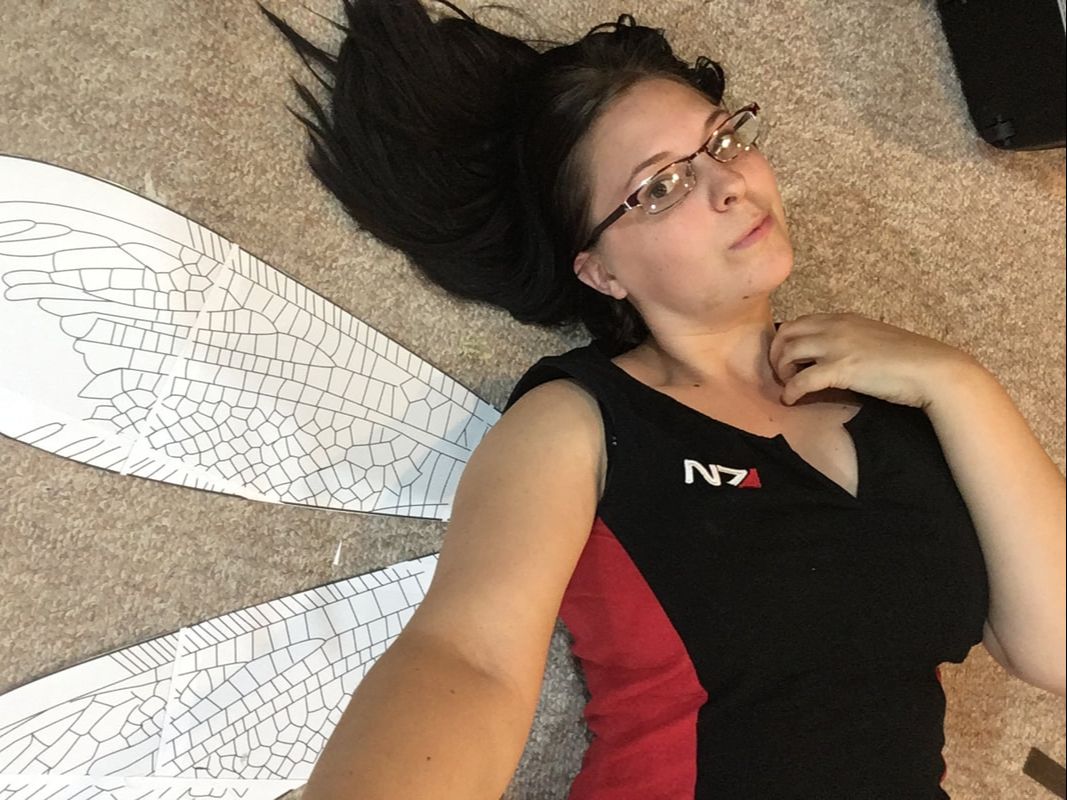 I then cut a front and a back piece out of vinyl for each wing by folding the vinyl in half, tracing the pattern with a dry-erase marker, and snipping with some very sharp scissors. I had to be very careful to make sure all the wrinkles were absent from the vinyl before cutting; a single small wrinkle on one side of the wing would throw the entire alignment off when I tried to sandwich them together after painting! 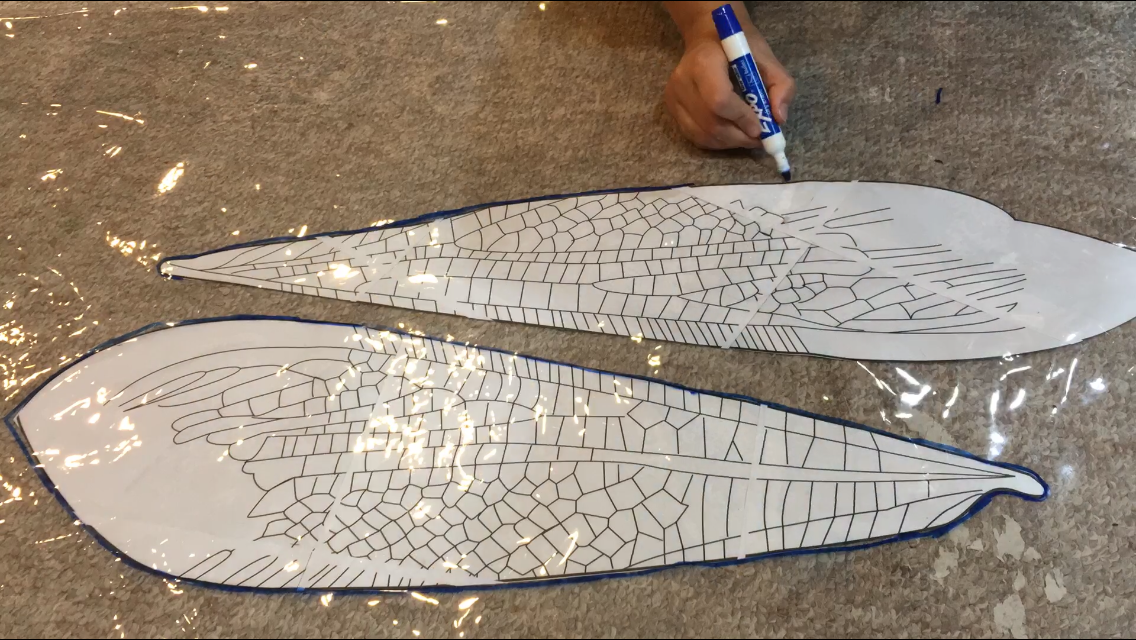
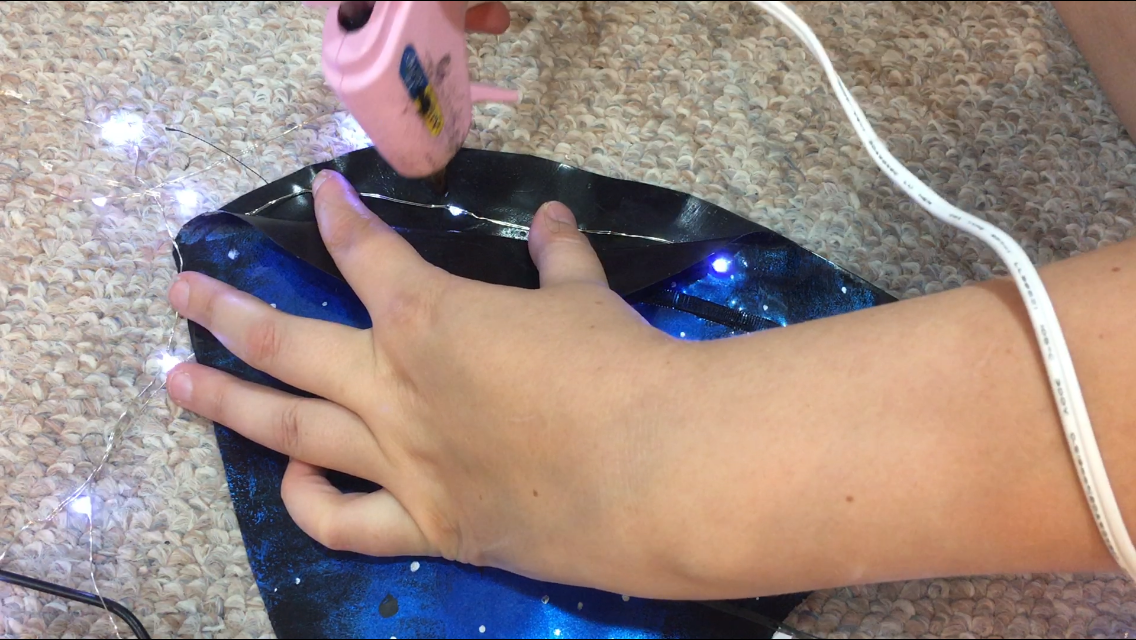
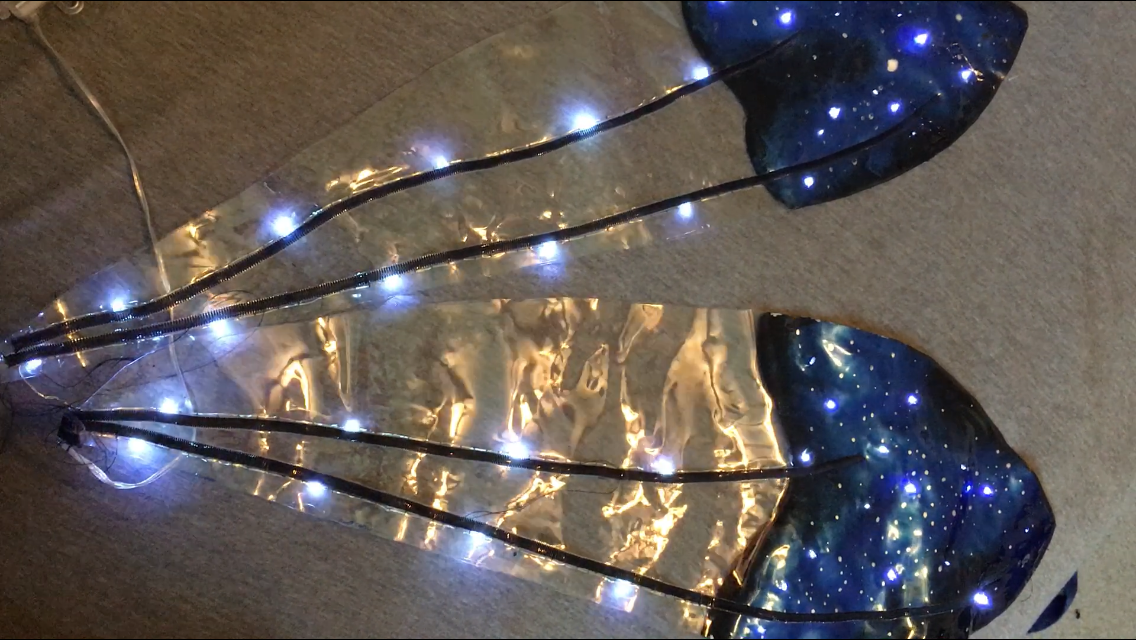
 I let the wings dry for a full 24 hours before stitching them together. I started with the two major vein near the top of the wing, using a satin stitch on my machine -- a stitch with a length of almost zero and a width as high as I could get it! This created a channel in between the two wings, which later would serve as the housing for a supporting wire. 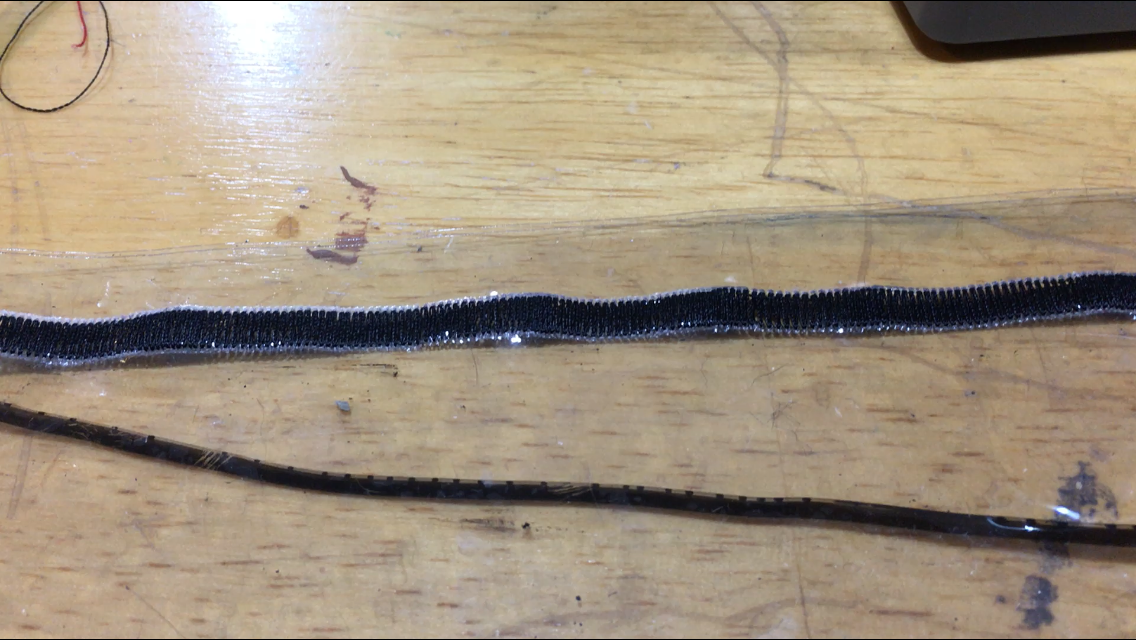 Once the first vein was stitched in, I started adding the lights! One 15m strand of pre-programmed lights was enough to cover two full wings. Placing the lights in the wings involved two separate processes: hand-stitching the strand to the long veins in the clear part of the wing, and then cutting holes and hot-gluing each individual light into the painted part of the wing.
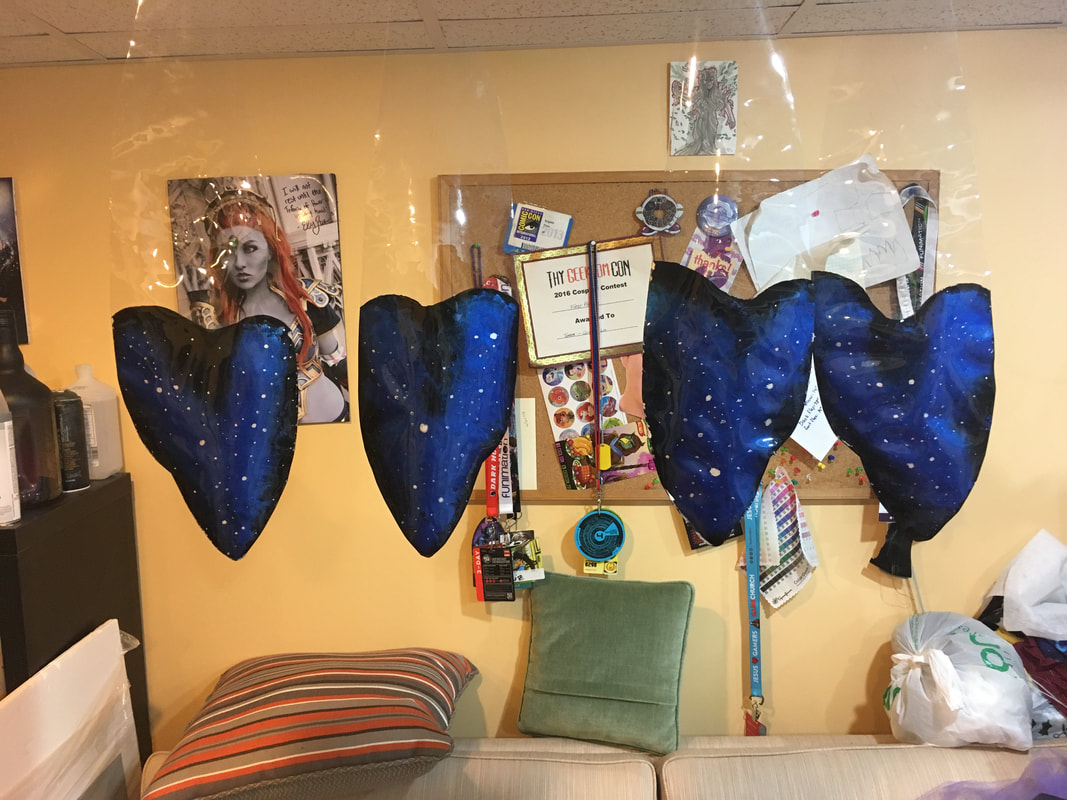
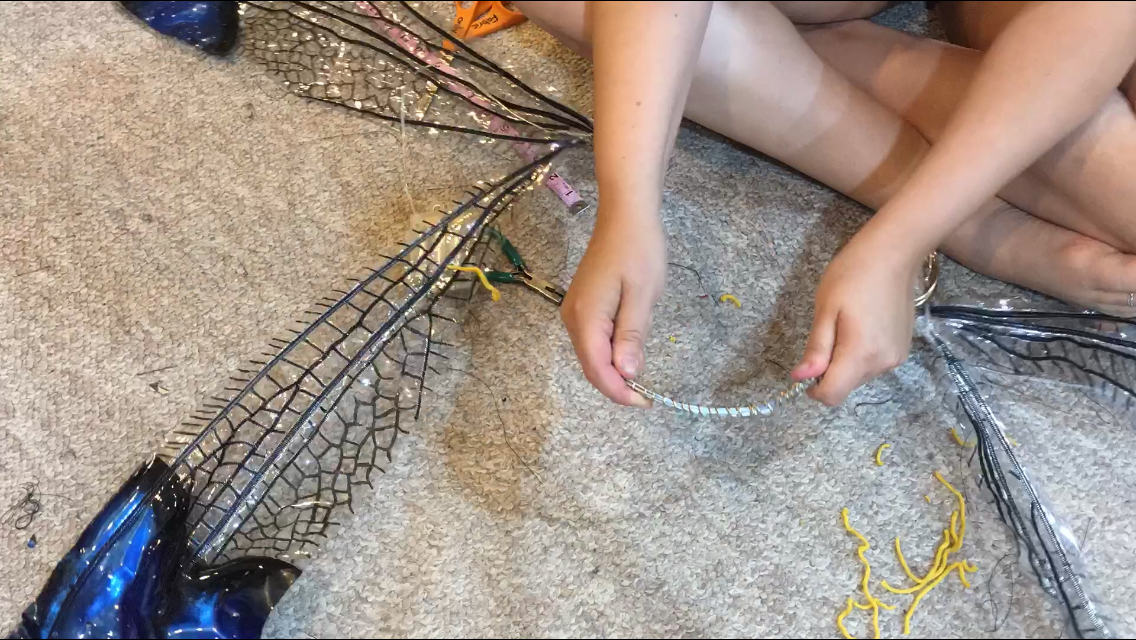
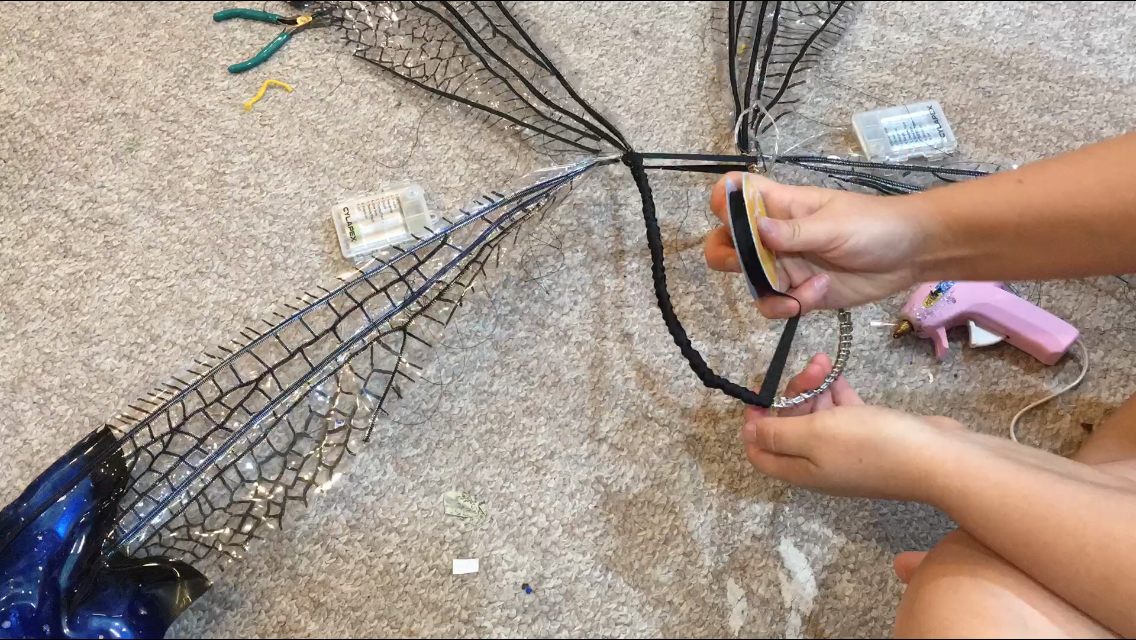
The lighting process took a pretty significant amount of time, but the end result was totally worth it! Once the lights were in, I was able to stitch the other big vein of the wing and the other small wing details. I started by thinking I was going to machine-stitch all of the individual veins, but that ended up not working for three reasons: first, it was incredibly time-consuming. One wing would have taken 4-5 hours just to stitch! Second, my machine was being a huge butt and kept creating a million snags. This was especially frustrating because I couldn't just pick out the knots and start over; the needle made irreparable holes in the vinyl, meaning I had one shot before the seam integrity was compromised and I would end up with a hole in my fabric. Finally, I was too lazy to tie off all the individual strings, and as a result, the one section I did detail with a small satin stitch started to fray and look really gross. 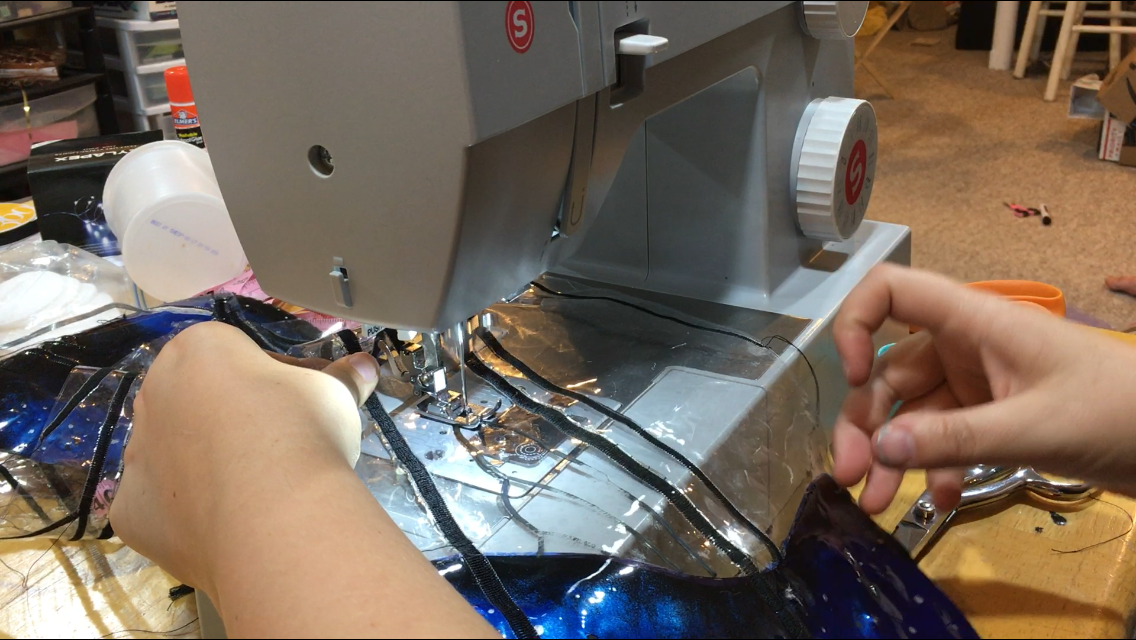 In the end, I decided to satin stitch the major veins and use marker to do all the small vein details. In the future, I may use puff paint to add dimension, but the marker was great for the photoshoot! Once the details were in, it was time to add the stainless steel wire. Adding the wire was by far the most time-intensive and frustrating part of these wings. I killed my finger muscles and accidentally punctured the vinyl several times with a wire tip that was jagged from the bolt cutter I used to snip the wires. 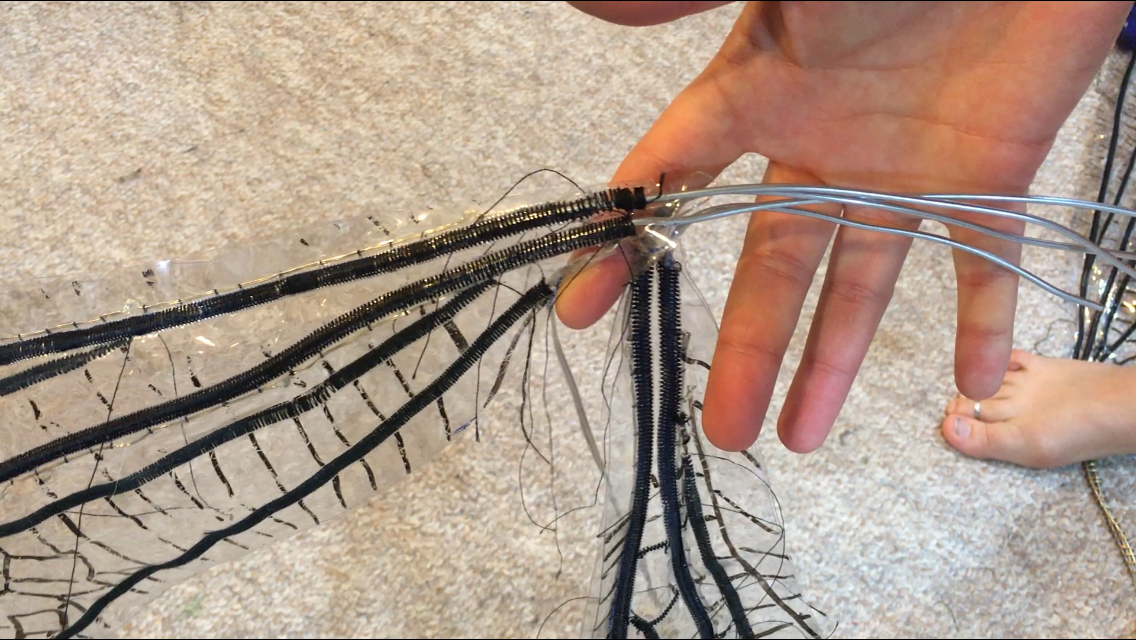 The end result was two wires per wing, or four wires per side. I used these for a classic way of mounting wings: a 'U' shape of wire bent into the back of my support garments. At this point, the wings were *really* heavy so I wanted to make sure I had a strong support. The "U" shape ended up being 24 inches long! I took my wires and lined them up end-to-end. I snipped the wires so that the support structure would always be exactly four wires thick: where the wire from one side ended, I snipped a wire from the other side to meet up with it exactly. 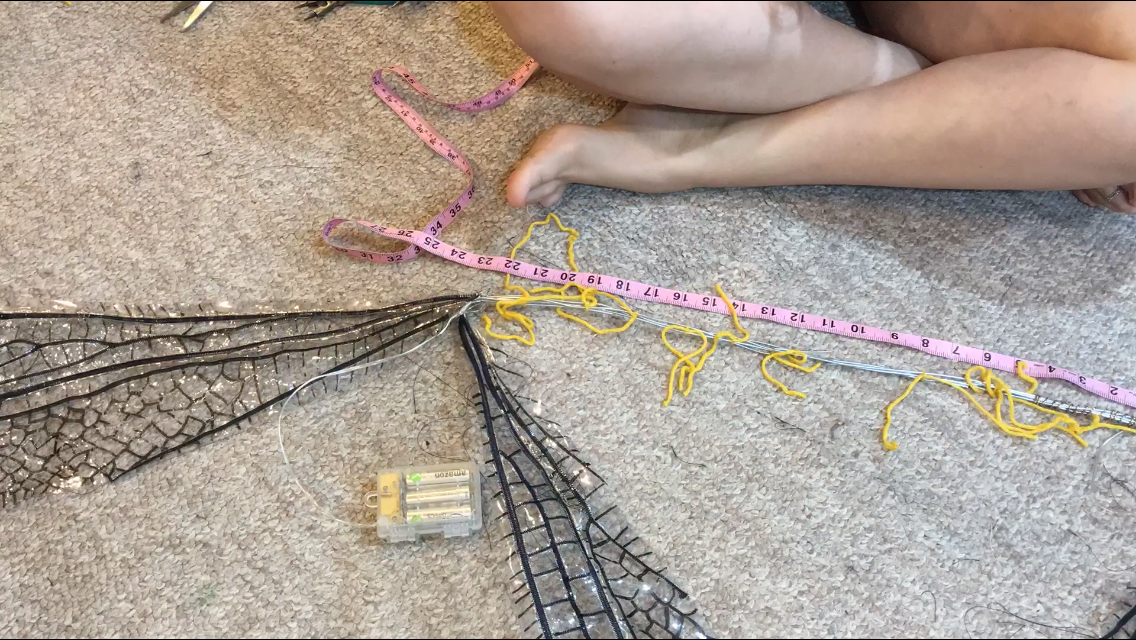 I then wrapped the stainless steel support wires with a lighter, more flexible craft aluminum wire and bent the whole thing into the "U" shape. I finished it off with a bit of ribbon wrapped around the wire frame for comfort, as well as adding a support ribbon at the base of the wings to keep them from sagging off to the side.
Ta-Da! Wearable wings! I finished wrapping the U-brace and was getting ready to try them on for the very first time, so I flipped on the lights in anticipation and... only one side lit up. Upon further inspection, I accidentally tugged a little too hard on one of the battery packs and it straight up fell off the lead wires to the LED string. WHOOPS, I was just a bit too rough with it! 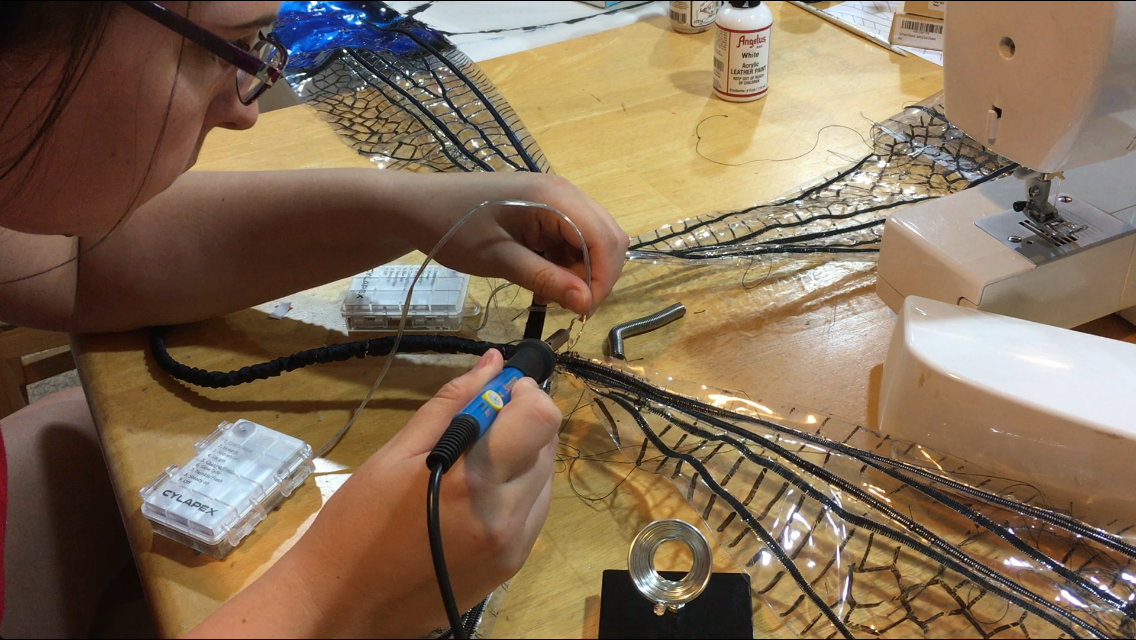 Luckily, it was an easy fix -- all I needed was a soldering iron. Unfortunately, I didn't have one a t the time, so I had to quickly order one from Amazon and wait a few days. Once it arrived, I unpackaged it and got to work! The repair only took about five minutes, and then the wings were DONE!
0 Comments
Leave a Reply. |
Ginny Liz StorytimeEntirely too much rambling about costumes, but if that's your thing... Archives
October 2018
Categories
All
|

 RSS Feed
